

There’s a moment on Sunday mornings when the whole house smells like something serious is happening in the kitchen. That smell is Sunday gravy, and once you make it yourself, your weekends will never feel the same. This isn’t a quick tomato sauce you throw together on a Tuesday. It’s the real deal — slow-simmered, meat-loaded, and deeply flavored in a way that only hours on the stove can produce.
- What Actually Makes Sunday Gravy Different
- Ingredients for Sunday Gravy
- Pork Neck Bones
- Italian Sausage
- Meatballs
- White Onion
- Garlic
- Tomato Paste
- Crushed Tomatoes and Tomato Puree
- Dried Basil, Oregano, and Bay Leaf
- Sugar
- Olive Oil and Salt
- How to Make Sunday Gravy Step by Step
- Step 1: Brown the Pork Neck Bones
- Step 2: Brown the Italian Sausage
- Step 3: Cook the Onion Low and Slow
- Step 4: Add the Garlic
- Step 5: Add the Tomato Products
- Step 6: Season the Sauce
- Step 7: Return the Meat to the Pot
- Step 8: Simmer All Day
- Step 9: Taste, Adjust, and Serve
- Pro Tips to Make the Perfect Sunday Gravy
- Serving Ideas
- Frequently Asked Questions
- Can I make Sunday gravy without pork neck bones?
- How long does Sunday gravy need to simmer?
- Can I make Sunday gravy ahead of time?
- Why does my sauce taste sharp or acidic?
- What pasta shape works best with Sunday gravy?
- Conclusion
- sunday gravy recipe
“You have begged and pleaded for this secret recipe — and today’s the day.”
That quote isn’t from a cookbook or a famous chef. It came from someone who grew up eating this sauce every Sunday, watched their grandmother make it without measuring a single thing, and finally decided to share what they knew. That’s the kind of recipe this is — earned, not invented.

What Actually Makes Sunday Gravy Different
Let’s clear something up right away because a lot of people get this wrong. Sunday gravy is not Bolognese. Bolognese is a ground meat sauce where everything blends together. Sunday gravy is something else entirely. You brown whole cuts of meat, drop them into a tomato base, and let them simmer all day. The meat flavors the sauce. The sauce flavors the meat. They work together for hours and come out the other side as something genuinely special.
The name itself changes depending on who you ask. Some Italian-American families call it sugo. Others call it gravy. Some just call it “the sauce” and look at you sideways if you need more clarification than that. The tradition started out of pure practicality. Grandparents who worked in butcher shops would bring home whatever cuts didn’t sell. Grandmothers would throw everything in the pot. Nothing went to waste, and somehow, something legendary came out of it every single Sunday.
Ingredients for Sunday Gravy
Here’s something worth understanding before you get started. This recipe is a foundation, not a strict formula. Your Italian sausage won’t be identical to someone else’s. Your canned tomatoes will taste slightly different. That’s completely fine. Get the best version of each ingredient you can find locally, follow the method, and trust that the long cook time will bring everything together.
Pork Neck Bones
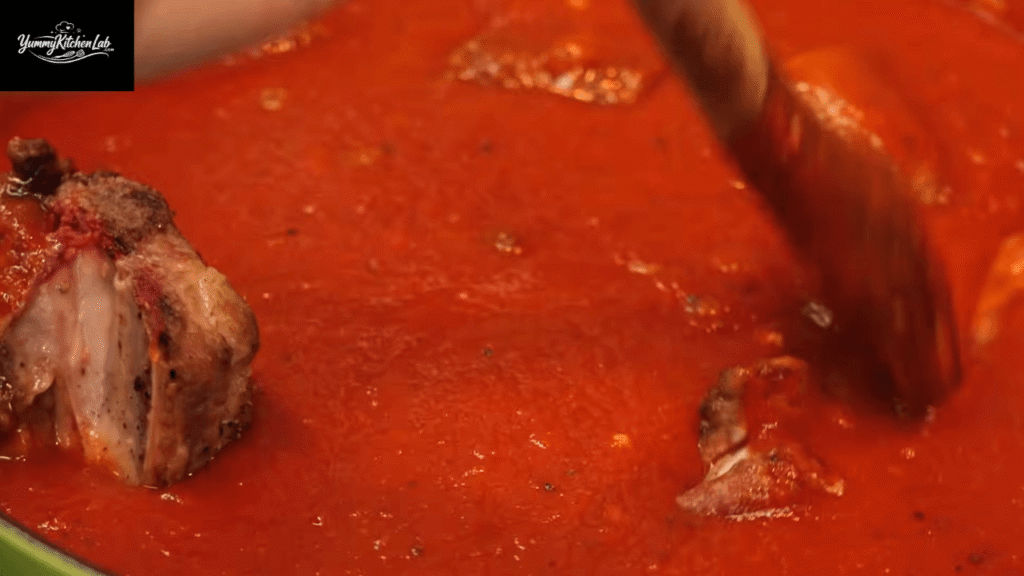
Pork neck bones are the ingredient most people skip, and honestly, that’s the biggest mistake you can make with this sauce. They’re loaded with collagen and fat that slowly dissolve into the tomatoes during the long simmer, creating a richness that no shortcut can replicate. You can find them at most butcher shops or Latin grocery stores, and they’re genuinely inexpensive. Don’t let the look of them throw you off. When the meat starts falling cleanly off the bone, that’s your signal that the sauce is ready.
Italian Sausage
The quality of your sausage has a bigger impact on this sauce than almost any other ingredient. A locally made sausage with a good balance of fennel, pepper, and pork fat will produce a noticeably better result than a generic supermarket link. The fat renders out during browning and becomes part of the flavor base for everything that follows. If you can track down a small-batch or family-made sausage in your area, use it. Skip anything labeled “lean” or made from chicken. The fat is not the problem here. The fat is the point.
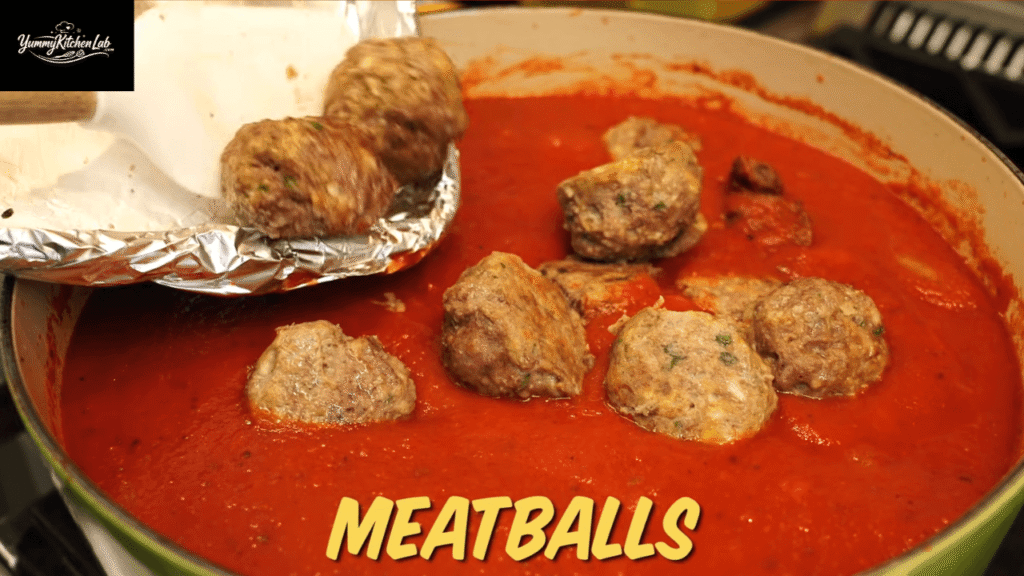
Meatballs
Meatballs go in browned, not raw. You’re not dropping raw meatballs into the pot to cook from scratch. You brown them first, then add them to the sauce so they can finish cooking while also contributing flavor to everything around them. FYI, making a double batch of meatballs and keeping them in the freezer is one of the smartest meal prep moves you can make. Your next Sunday sauce becomes twice as easy when half the work is already done.
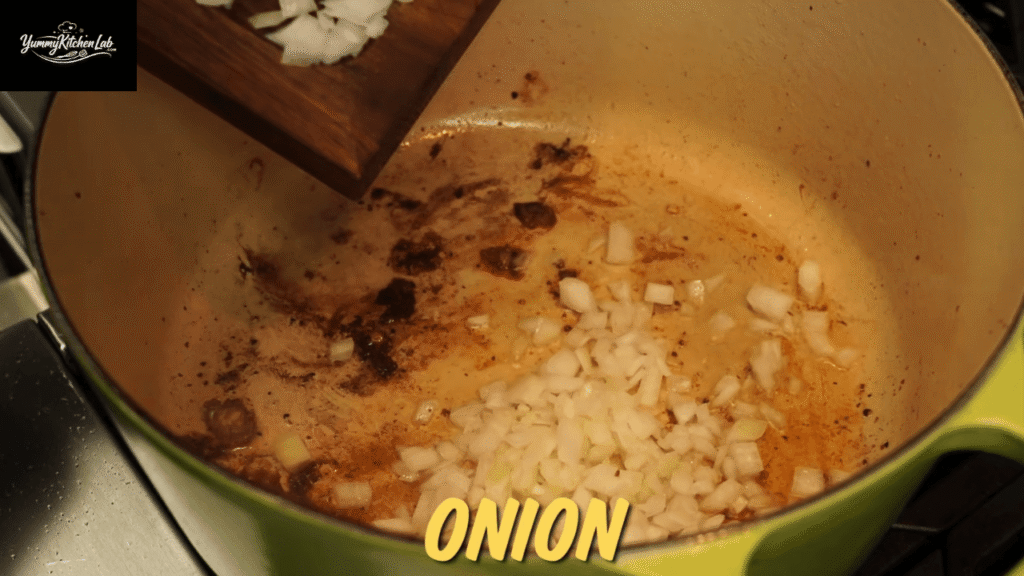
White Onion
One full white onion, finely chopped, goes in after the meat is browned. The word “finely” matters here, and so does patience. Undercooking the onion is one of the most common reasons a Sunday gravy falls flat. Even after six hours of simmering, an onion that didn’t fully soften at the start will leave a noticeable bite in the finished sauce. Cook it low and slow in the meat drippings until it’s completely soft and translucent. That’s when the mellow, sweet onion flavor actually releases into the sauce.
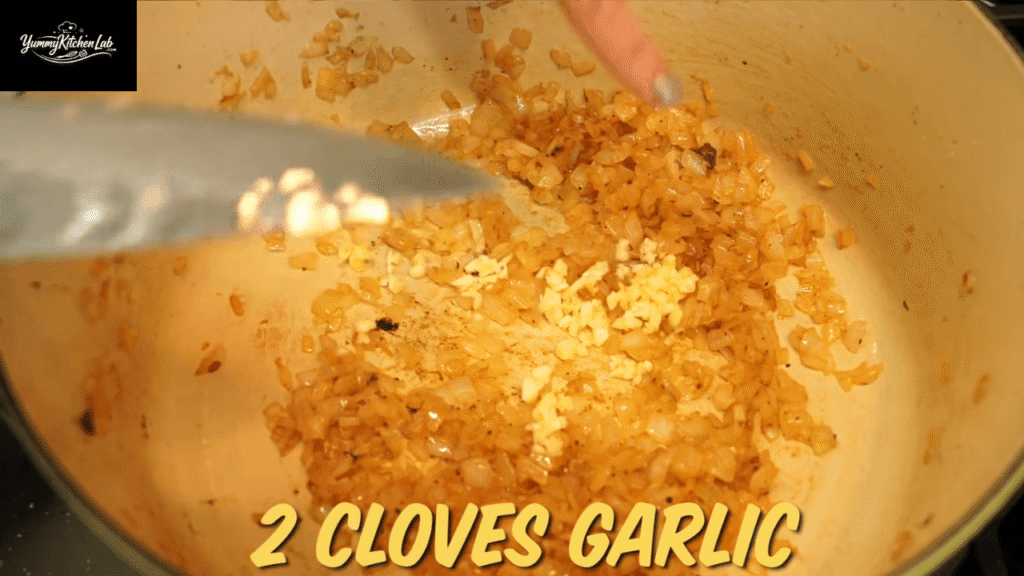
Garlic
Garlic goes in near the end of the onion’s cooking time, not at the beginning. Two minutes in the pot is enough. Adding it too early risks burning it, and burnt garlic flavor is nearly impossible to fix in a long-simmered sauce. Use fresh cloves and mince them yourself. Jarred garlic paste sounds convenient, but the flavor difference in a sauce that cooks for six or more hours is noticeable enough to matter.
Tomato Paste
Two large cans of tomato paste. Yes, two. That’s not a typo. Tomato paste is concentrated flavor, and it forms the thick, rich base that separates Sunday gravy from a thin weeknight marinara. It also adds depth to the color and a subtle sweetness that balances the acidity of the other tomato products. Don’t substitute crushed tomatoes in its place. They’re not the same thing and they won’t produce the same result, no matter how long you cook them.
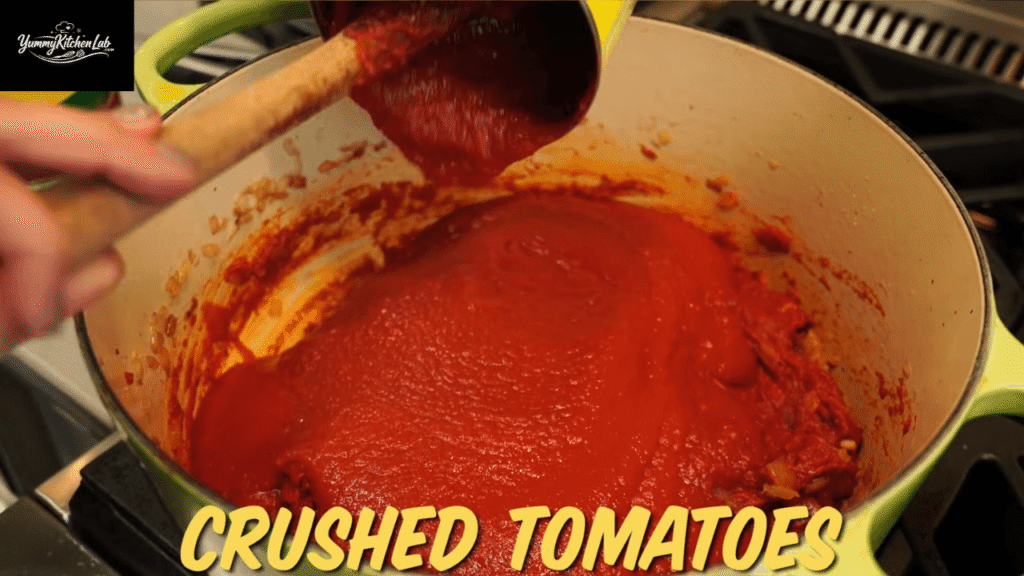
Crushed Tomatoes and Tomato Puree
These two products go in after the paste to build the body and volume of the sauce. Quality matters here. San Marzano tomatoes or any brand with a bright, clean flavor will make a real difference in the final result. When the cans are empty, rinse them with water and add that liquid to the pot. You’ll add about six to seven cups of water this way, which sounds like a lot but cooks down considerably over the course of the day.
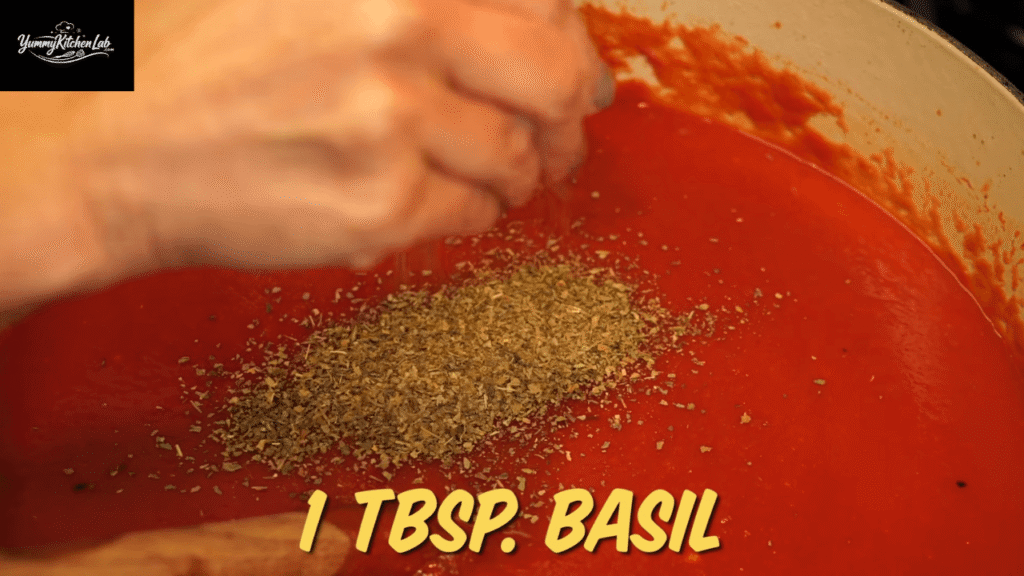
Dried Basil, Oregano, and Bay Leaf
Dried herbs are the right call for a long-cooked sauce like this. Fresh basil added at the start of a six-hour simmer contributes absolutely nothing by the end. Dried basil, crushed between your fingers to crack open the dried leaves and release the oils, has hours to slowly work its flavor into the sauce. Oregano is stronger than basil, so use about half a teaspoon. One bay leaf does a quiet but real job of rounding out the flavor. Just remember to pull it out before you serve.
Sugar
Sugar is not optional and it’s not a cheat. It’s a technique. Canned tomatoes, especially paste, carry a sharpness that doesn’t fully cook away on its own. A small amount of sugar softens that edge without making the sauce taste sweet. Start with a teaspoon and adjust at the very end after you taste the finished sauce.
Olive Oil and Salt
Olive oil handles the browning of the meat and the sautéing of the onions. Don’t swap it out for a neutral oil. Olive oil adds its own flavor to those browned bits at the bottom of the pan, and when the tomatoes go in later, they lift all of that off the bottom and carry it into the sauce. Salt the meat before browning and add salt to the onions while they cook. Salting the onions draws out moisture and helps them soften faster.
How to Make Sunday Gravy Step by Step
Step 1: Brown the Pork Neck Bones
Season the neck bones with salt and pepper, then add them to a large heavy pot with olive oil over medium-high heat. You’re not cooking them through right now. The goal is to build a good brown crust on the outside. Let them sit without moving until the color develops, then flip. Once both sides are browned, take them out and set them aside.
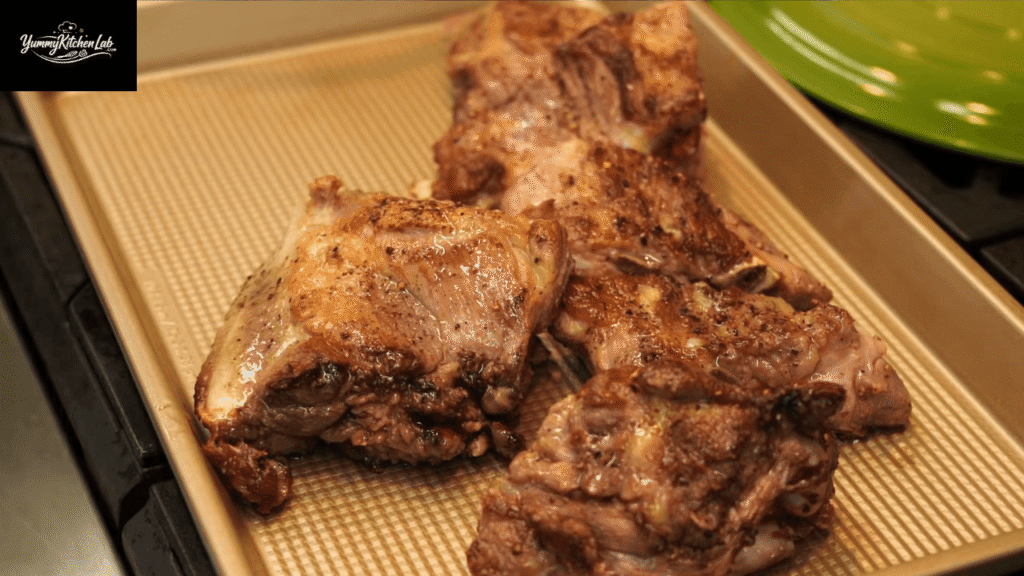
Step 2: Brown the Italian Sausage
Add the sausage to the same pot without wiping it out first. Those dark bits left from the neck bones are flavor, and you want them. Brown the sausage links on all sides, then remove them and set them aside with the neck bones. The bottom of your pot should look dark and rich at this point. That’s not a problem. That’s the goal.

Step 3: Cook the Onion Low and Slow
Add a couple more teaspoons of olive oil to the pot and add your finely chopped onion. Drop the heat to medium-low. This step takes patience. The onion needs to cook until it’s completely soft and translucent. Not browned, not caramelized. Just fully softened. Add a teaspoon of salt to help it along. This is the step most people rush, and it shows in the finished sauce.
Step 4: Add the Garlic
Once the onion is properly soft, add the minced garlic and cook it for about two minutes while stirring frequently. Garlic goes from fragrant to burnt faster than you’d expect, and that flavor doesn’t leave. You want it soft and fragrant, not dark.
Step 5: Add the Tomato Products
Add both cans of tomato paste first and stir them into the onion and garlic until everything is coated. Then pour in the crushed tomatoes and tomato puree. Rinse all the cans with water and pour that into the pot as well. The sauce will look thinner than you expect right now. That’s fine. It has hours to thicken up.
Step 6: Season the Sauce
Crush the dried basil between your fingers and add it to the pot. Follow with the oregano, black pepper, bay leaf, and sugar. Stir everything together and give it a taste. The raw canned tomato flavor will be obvious at this stage. Don’t panic and don’t over-season trying to fix it. The long cook time will take care of it.
Step 7: Return the Meat to the Pot
Add the neck bones, sausage, and browned meatballs back into the sauce. Nestle them in so they’re mostly covered by the tomatoes. Bring the pot up to a boil, then immediately reduce the heat to low. Cover it and let it do its thing.
Step 8: Simmer All Day
This sauce needs time. Give it a minimum of four hours, and six or more is genuinely better. Keep the heat at the lowest setting that still maintains a slow bubble. Stir every hour or so and check the level. Some reduction is natural. If it’s thickening too fast before the meat is tender, add a small splash of water. The sauce is ready when the neck bone meat separates from the bone without any effort.
Step 9: Taste, Adjust, and Serve
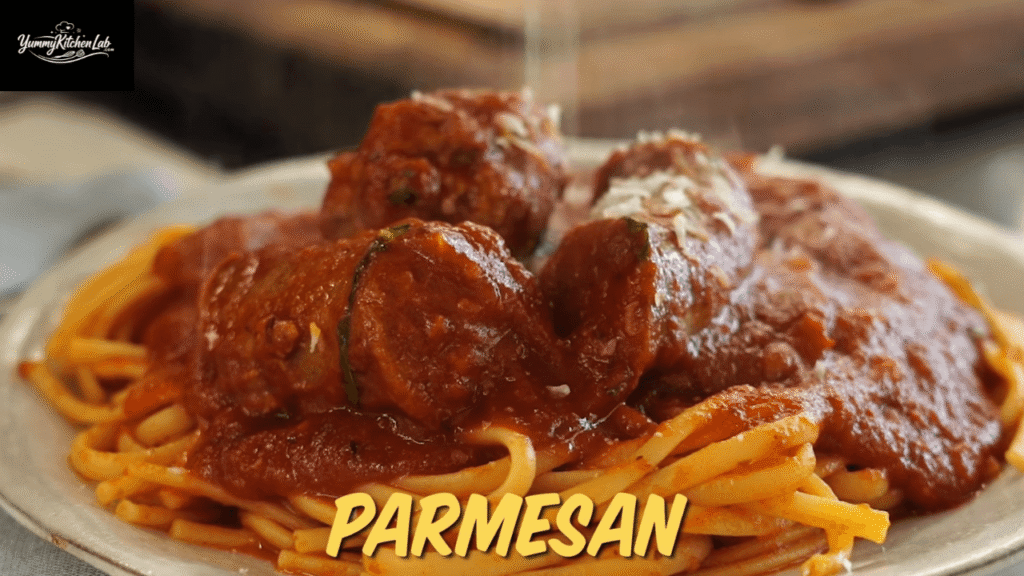
Before anything hits a plate, taste the sauce and adjust the salt. The flavor now will be completely different from what it tasted like at hour one. Add fresh basil or parsley at this point. To serve, toss your drained pasta with a ladle of sauce first so every piece is coated, then plate it and spoon more sauce over the top. Serve the meat on the side or right on top, whichever way your family prefers.
Pro Tips to Make the Perfect Sunday Gravy
A few things separate a Sunday gravy that’s just good from one that people remember. These tips are worth reading before you start.
Never skip the browning step. The color you build on the meat and the fond left in the pot are the entire flavor foundation of the sauce. Meat that goes in without browning produces a sauce that tastes thin and flat, even after hours of cooking.
Cook the onions longer than feels necessary. If you think they’re done, give them five more minutes. An onion that looks soft often still has sharpness in the center. Fully translucent is the target.
Crush dried herbs before they go in. Rubbing dried basil between your fingers cracks the dried leaves and releases the oils inside. This is especially important for dried herbs because the oils are locked in until you break the leaves open.
Make the sauce a day ahead if you can. Sunday gravy tastes noticeably better the next day. The flavors settle and deepen overnight in a way that hours of active simmering can’t replicate. Make it Saturday, reheat it Sunday, and you’ll taste the difference.
Rinse every tomato can with water. The flavor that clings to the inside of those cans is real. Rinse with a small amount of water, swirl it around, and pour it into the pot. Over the full recipe, this adds up to a meaningful amount of flavor you’d otherwise wash down the drain.
Freeze it in batches. This sauce holds in the freezer for up to three months without losing quality. Make a full pot, freeze half in portions, and your next Sunday sauce starts halfway done. Reheat slowly over low heat with a splash of water if it’s thickened up.
Eat the neck bone meat, don’t discard it. The meat that falls off those bones is extraordinarily tender and has absorbed hours of sauce flavor. IMO, it’s the best part of the whole meal. In many families, people fight over it.
Always taste before serving, not just at the beginning. The salt balance in a long-cooked sauce shifts over time. What it needed at hour one is not necessarily what it needs at hour six. Taste at the end and adjust.
Serving Ideas
Sunday gravy is designed to be shared at a table with people who aren’t in a hurry. Here are four ways to serve it that make the most of what you’ve spent all day building.
The Classic Sunday Table
Serve the sauce over rigatoni or spaghetti and put the meat on a separate platter in the center of the table. Let everyone build their own plate. Bring good bread for the leftover sauce in the pot. This is the traditional way, and there’s a reason it’s survived for generations.
The Bread and Sauce Lunch
In a lot of Italian-American households, the Sunday meal actually happens in two parts. Thick slices of crusty bread get dipped directly into the pot at noon while the sauce is still simmering. Then pasta comes out later in the afternoon for the main event. It sounds simple, but dipping bread into a pot of Sunday gravy that’s been going for four hours is one of the best things you can eat.
Reheated as a Weeknight Pasta
The next day, reheat the leftover sauce over penne, rigatoni, or ziti with a handful of grated Pecorino Romano stirred in. Dinner is on the table in under fifteen minutes and tastes even better than it did the day before. Leftovers from this sauce are genuinely something to look forward to.
As the Base for Baked Ziti
Leftover Sunday gravy makes a baked ziti that’s on a completely different level from anything made with a quick tomato sauce. Layer it with cooked ziti, ricotta, and mozzarella, top with breadcrumbs, and bake until it’s bubbling and golden. The richness from the long-cooked gravy carries through the whole dish.
For presentation, use a wide, shallow bowl rather than a deep one. It lets the pasta, sauce, and meat all be visible rather than stacked. Fresh basil and a pass of Pecorino Romano at the table are all the garnish this needs.
Frequently Asked Questions
Can I make Sunday gravy without pork neck bones?
You can, but the sauce will be less rich. Neck bones contribute collagen and fat that dissolve into the sauce during the long cook and create the body and depth that makes this sauce what it is. If you can’t find them, pork ribs or a small piece of pork shoulder are the best substitutes. Avoid lean cuts that have nothing to give during a long simmer.
How long does Sunday gravy need to simmer?
Four hours is the minimum. Six is better. Eight is not too long. A slow cooker set on low for eight hours also works well if you’d rather not babysit the stove. The longer it goes at a gentle heat, the more flavor develops between the meat and the tomatoes.
Can I make Sunday gravy ahead of time?
Yes, and many people prefer to. The sauce genuinely tastes better after sitting overnight in the refrigerator. Make it the day before, reheat it gently before serving, and it will be better than it was fresh. It also freezes well for up to three months.
Why does my sauce taste sharp or acidic?
Two things usually cause this: the sugar was skipped or not used in a large enough amount, and the sauce didn’t cook long enough. Both the sugar and the extended simmer time work together to mellow the natural acidity of canned tomatoes. If the sharpness is still there after several hours, add a small pinch more sugar and give it more time.
What pasta shape works best with Sunday gravy?
Spaghetti is the classic choice, but any pasta with texture holds up well. Rigatoni, penne, and ziti are all great because the ridges and hollow centers trap the sauce. Avoid very thin pasta like angel hair. The sauce is too rich and heavy for it.
Conclusion
Sunday gravy is one of those recipes that rewards you for slowing down. It asks for time, a little patience with the onions, and enough trust to leave the pot alone while the magic happens. Once you make it, though, it tends to become a fixture. You start planning Sundays around it. You start keeping meatballs in the freezer. You start judging every other tomato sauce by what you know this one can do.
Give it a try this weekend. Tag someone who needs to smell what a real Sunday smells like.
sunday gravy recipe
Ingredients
- 1 lbs pork neck bones
- 1 lb Italian sausage links
- 7 meatballs, browned
- 1 large white onion, finely chopped
- 4 garlic cloves, minced
- 2 large cans tomato paste
- 1 large can crushed tomatoes
- 1 large can tomato puree
- 6 cups water from rinsed cans
- 1 heaping tbsp dried basil
- 1/2 tsp dried oregano
- 1/2 tsp black pepper
- 1 bay leaf
- 1 tsp sugar
- Olive oil and salt to taste
Instructions
- Season neck bones with salt and pepper. Brown in olive oil in a large pot. Remove and set aside.
- Brown sausage in the same pot. Remove and set aside.
- Add olive oil and onion. Cook on medium-low for 15 to 20 minutes until fully soft. Add 1 tsp salt while cooking.
- Add garlic. Stir and cook for 2 minutes.
- Add tomato paste, crushed tomatoes, and puree. Rinse cans and add that water to the pot.
- Add crushed basil, oregano, black pepper, bay leaf, and sugar. Stir well.
- Return neck bones, sausage, and meatballs to the pot.
- Bring to a boil, then reduce to low. Cover and simmer 6 to 8 hours, stirring every hour.
- Taste and adjust salt. Add fresh basil before serving.
- Toss drained pasta with sauce before plating. Serve meat alongside.
Video
Notes
- Freezes well for up to 3 months. Reheat on low with a splash of water.
- Tastes better the next day. Make it ahead when possible.
- No neck bones available? Use pork ribs or a small pork shoulder instead.