

Some appetizers show up to the party and fade into the background. Fried mac and cheese bites are not those. These little golden spheres deliver a shatteringly crisp exterior and a molten, seasoned cheese center that makes people stop mid-conversation to reach for another one. Whether you are hosting a game day crowd or just want a genuinely satisfying snack, this recipe is one of the most crowd-pleasing things you can put on a table.
- Ingredients
- Elbow Macaroni
- Chicken Stock
- Pepper Jack Cheese
- Mozzarella
- Mild Cheddar
- Smoked Gouda
- All-Purpose Seasoning (Salt, Pepper, Garlic Powder, Onion Powder)
- Cayenne Pepper and Smoked Paprika
- Eggs and Heavy Cream (Egg Wash)
- All-Purpose Flour
- Italian Breadcrumbs
- Peanut Oil or Canola Oil
- Japanese Mayo, Sriracha, Garlic Paste, Ketchup, and Cajun Seasoning (Dipping Sauce)
- How to Make Fried Mac and Cheese Bites (Step by Step)
- Step 1: Shred Your Cheese First
- Step 2: Boil the Macaroni in Chicken Stock
- Step 3: Season the Noodles and Add the Cheese
- Step 4: Chill the Mac and Cheese Until Firm
- Step 5: Set Up Your Breading Station
- Step 6: Form and Bread the Mac and Cheese Bites
- Step 7: Heat the Oil to 350°F
- Step 8: Fry the Bites Until Golden Brown
- Step 9: Make the Dipping Sauce and Plate
- Pro Tips to Make the Perfect Fried Mac and Cheese Bites
- Serving Ideas
- Can I bake these instead of frying them?
- Why did my mac and cheese bites fall apart in the fryer?
- Can I use a different cheese blend?
- How do I store and reheat leftover bites?
- Can I make these ahead and freeze them before frying?
- Fried Mac and Cheese Bites
“Your NFL team might be disappointing you this year, but one thing that’ll never let you down are these recipes.”
That line comes straight from the kitchen — and it sets the tone perfectly. This is comfort food built for moments when you want something reliable, fun, and genuinely delicious. Fried mac and cheese bites sit at that exact intersection.
These bites have roots in Southern comfort food traditions, where mac and cheese has always been more than a side dish — it is a statement. Turning it into a fried appetizer takes that statement and makes it portable, shareable, and impossible to stop eating. The key to making them work is not just the frying — it is the mac and cheese base itself, which needs to be properly seasoned, properly chilled, and built with the right cheese blend. Get those three things right and the rest of the process is straightforward.
Ingredients
Before anything goes into a pan or a fryer, it helps to understand what each ingredient is actually doing here. This recipe has more moving parts than a standard mac and cheese because you are building something that needs to hold its shape under heat while still delivering that creamy, melty interior. Here is a breakdown of everything you need.
Elbow Macaroni
Elbow macaroni is the backbone of the entire recipe. Its small, curved shape holds onto the cheese sauce well and compacts tightly when chilled, which is exactly what you need for forming uniform bites. Do not swap this for a larger pasta shape — rigatoni or penne will not bind together the same way and will give you a messier, harder-to-form ball. Cook them per package instructions, usually 9 to 11 minutes, and avoid going past al dente since they will continue to soften slightly as you fold in the hot cheese.
Chicken Stock
Instead of plain salted water, this recipe uses chicken stock to boil the macaroni. That single swap adds a quiet layer of savory depth to every bite before any seasoning even touches the bowl. Use low-sodium chicken stock so you retain control over the salt level — full-sodium stock can make the final product taste over-salted once you add your seasoning blend on top. Store-bought cartons work perfectly fine here.
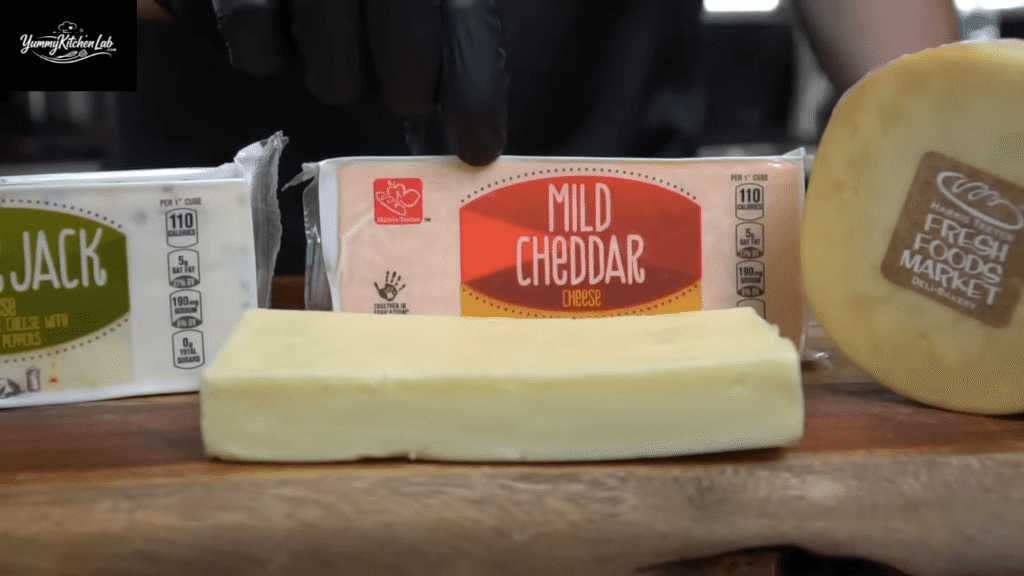
Pepper Jack Cheese
Pepper jack brings mild heat and excellent meltability to the blend. It is the cheese that gives the bites a subtle kick without overpowering the other flavors. Look for a block, not pre-shredded — the difference matters more than people realize. Pre-shredded cheese is coated in potato starch to prevent clumping in the bag, and that starch interferes with smooth melting, leaving you with a grainy texture instead of a creamy one.
Mozzarella
Mozzarella is the stretch. It is the cheese responsible for that pull-apart moment when you bite into one of these bites and the cheese strings out dramatically. Use a whole-milk low-moisture block rather than fresh mozzarella, which contains too much water and will make your mac and cheese mixture loose and difficult to work with. Grating it yourself straight from the block gives you the best melt.
Mild Cheddar
Mild cheddar adds that classic mac and cheese flavor that everyone expects. Sharp cheddar can work as a substitute, but mild gives a cleaner, more crowd-friendly taste that does not compete with the smoked gouda or pepper jack. As with all the cheeses in this recipe, buy a block and grate it yourself. The pro tip from the video is worth repeating: put the block in the freezer for 15 minutes before grating and it will shred much more easily without crumbling.
Smoked Gouda
Smoked gouda is the ingredient that makes people ask, “What is in this?” It adds a low, warm smokiness that you cannot quite identify but absolutely notice when it is missing. It is increasingly easy to find at most grocery stores — look in the specialty cheese section or near the deli counter. If you genuinely cannot find it, a regular gouda works as a substitute, though you will lose that smoky complexity.
All-Purpose Seasoning (Salt, Pepper, Garlic Powder, Onion Powder)
This blend seasons every layer of the recipe — the noodles, the flour, and the breadcrumbs. Using a premixed all-purpose seasoning keeps the process efficient, but you can absolutely build your own blend from salt, black pepper, garlic powder, and onion powder. The key is to season every component, not just the mac and cheese filling. Underseasoned breadcrumbs lead to a flat-tasting exterior that does not match the bold interior.
Cayenne Pepper and Smoked Paprika
These two work together to add warmth and color to the filling. Cayenne brings heat — start with a small amount and taste as you go. Smoked paprika adds another layer of that smoky flavor that echoes the gouda. Neither is optional if you want a well-rounded bite, though you can reduce the cayenne if the crowd skews spice-sensitive.
Eggs and Heavy Cream (Egg Wash)
Three eggs beaten with a splash of heavy cream form the binding layer that holds the breadcrumbs to the bites. Heavy cream gives a slightly richer, more golden exterior than milk alone. Half-and-half or whole milk will work if that is what you have, but avoid thin liquids like skim milk — they do not coat the bites as effectively and can cause the breadcrumbs to slide off during frying.
All-Purpose Flour
The flour is the first coat in the three-step breading process. It creates a dry surface for the egg wash to grip. Season it generously — bland flour means the coating tastes like nothing. Use standard all-purpose flour here. No need for anything specialty.
Italian Breadcrumbs
Italian breadcrumbs provide the crispy outer shell that makes these bites satisfying to bite into. The Italian seasoning already mixed into them adds an extra herb note that complements the cheese filling. Season them further with your all-purpose blend so the exterior is as well-flavored as the interior. Panko breadcrumbs are a valid substitute if you want an extra-crunchy shell, though they absorb a bit more oil.
Peanut Oil or Canola Oil
High-smoke-point oil is non-negotiable for frying. Peanut oil is ideal — it handles high heat cleanly and does not impart any off-flavors. Canola oil is a solid alternative and widely available. Never use olive oil or butter for deep frying. The target temperature is 350 to 365°F, and you will need a digital thermometer to confirm this accurately before adding your bites.
Japanese Mayo, Sriracha, Garlic Paste, Ketchup, and Cajun Seasoning (Dipping Sauce)
The dipping sauce is simple but genuinely good. Japanese mayo — specifically Kewpie — has a richer, slightly tangy flavor compared to standard American mayo. It creates a creamier, more complex aioli base. Sriracha brings heat, ketchup adds sweetness and body, and cajun seasoning ties it all together. This sauce takes about three minutes to mix and elevates the entire experience. You can use regular mayo if that is what you have, but Kewpie is worth seeking out.
How to Make Fried Mac and Cheese Bites (Step by Step)
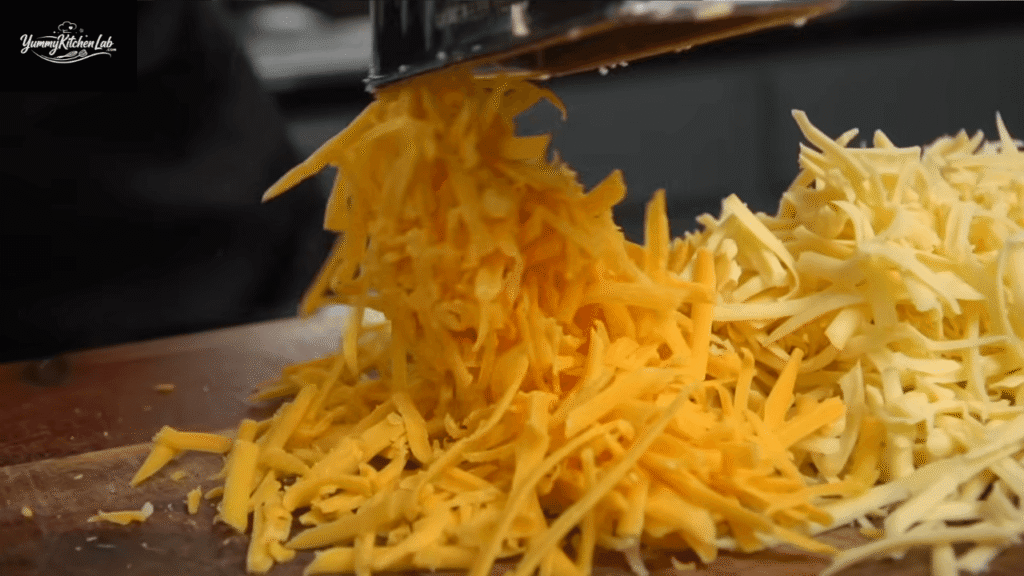
Step 1: Shred Your Cheese First
Place all four cheese blocks in the freezer for 15 minutes before you do anything else. Cold cheese shreds cleanly and quickly — warm cheese gums up the grater and sticks together in clumps. Once chilled, use a box grater to shred all four varieties into a large bowl. Set aside. This step takes the most manual effort in the recipe but it directly affects how well your cheese melts into the noodles.
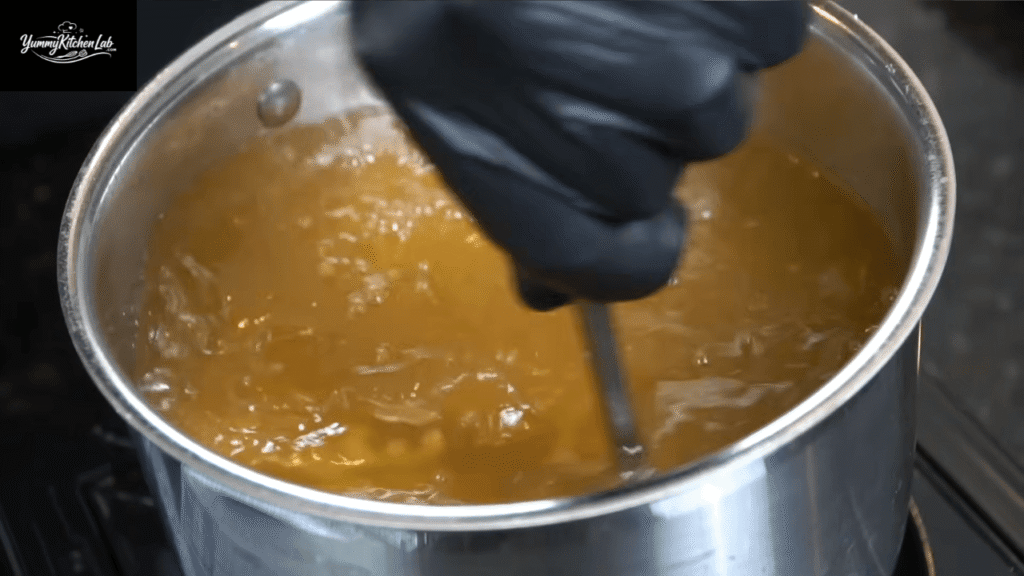
Step 2: Boil the Macaroni in Chicken Stock
Pour your chicken stock into a large pot and bring it to a boil. Add a pinch of salt, then add your macaroni noodles. Cook per package instructions — typically 9 to 11 minutes. You want them cooked through but not mushy, since they will be mixed, chilled, and then fried. Drain them well and transfer immediately to a large mixing bowl.
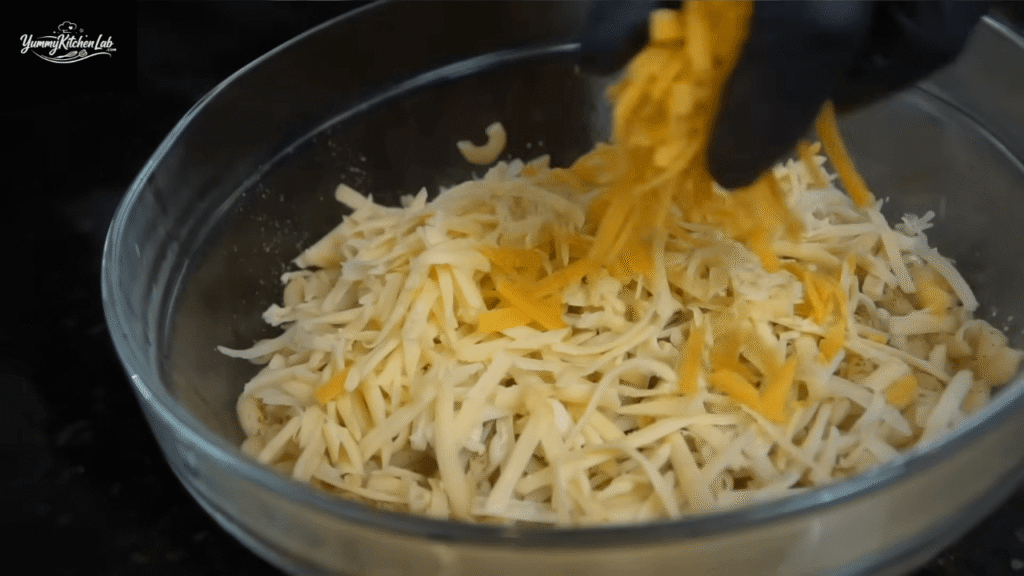
Step 3: Season the Noodles and Add the Cheese
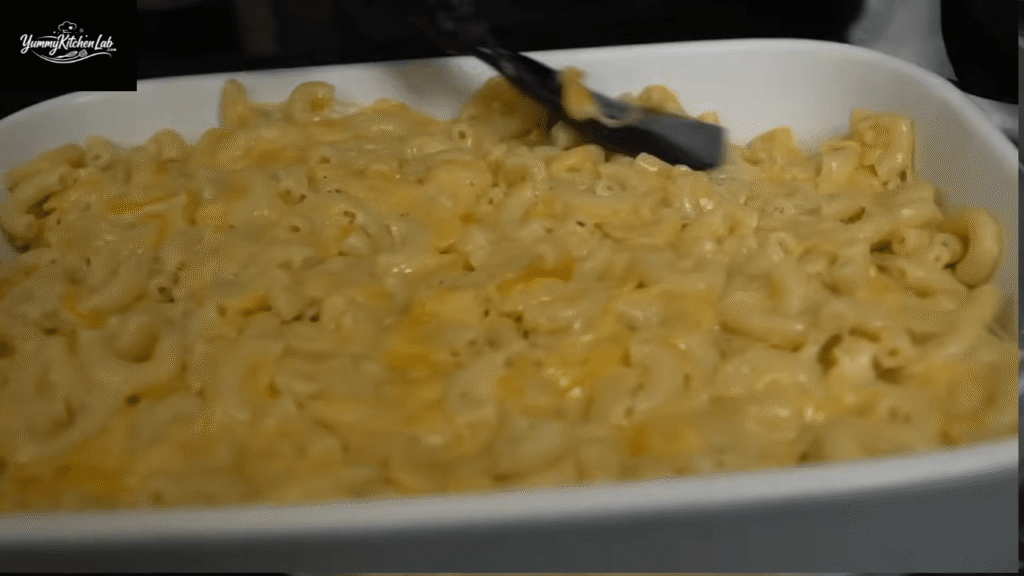
While the noodles are still hot, add your all-purpose seasoning, a pinch of cayenne, and smoked paprika directly to the bowl. Stir briefly to coat the noodles. Then begin adding your shredded cheese a handful at a time, folding it in with a rubber spatula rather than stirring aggressively. The residual heat from the noodles will melt the cheese — fold continuously until the mixture is smooth and creamy. Taste and adjust seasoning as you go.
Step 4: Chill the Mac and Cheese Until Firm
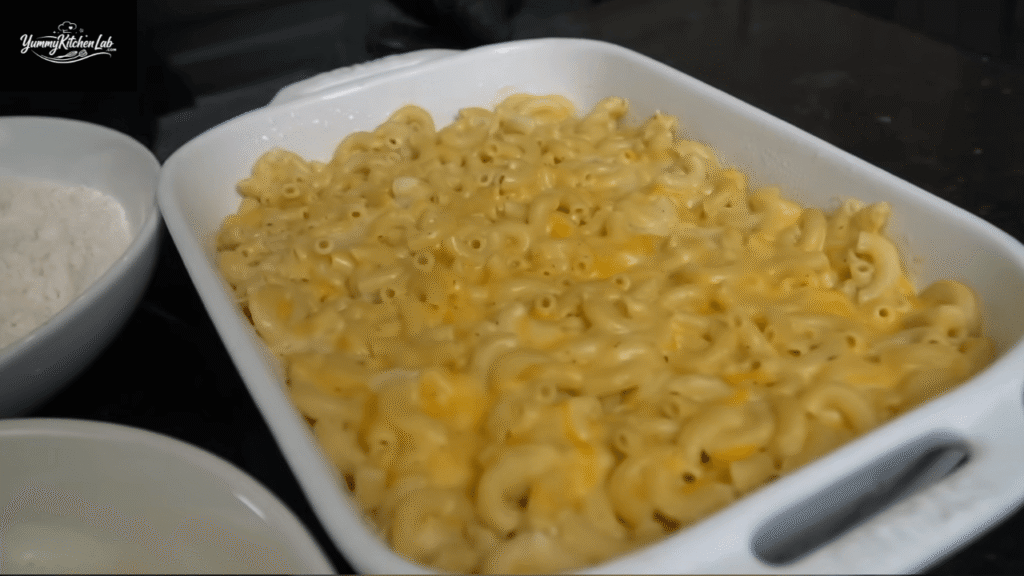
Transfer the finished mac and cheese mixture into a casserole dish and spread it evenly. Cover and place it in the freezer for at least one hour. This step is not optional — warm mac and cheese will not hold its shape when you try to form the bites, and they will fall apart in the fryer. If you are prepping ahead of time, you can refrigerate overnight and fry the next day. The mixture needs to be firm enough to scoop and squeeze into a compact ball.
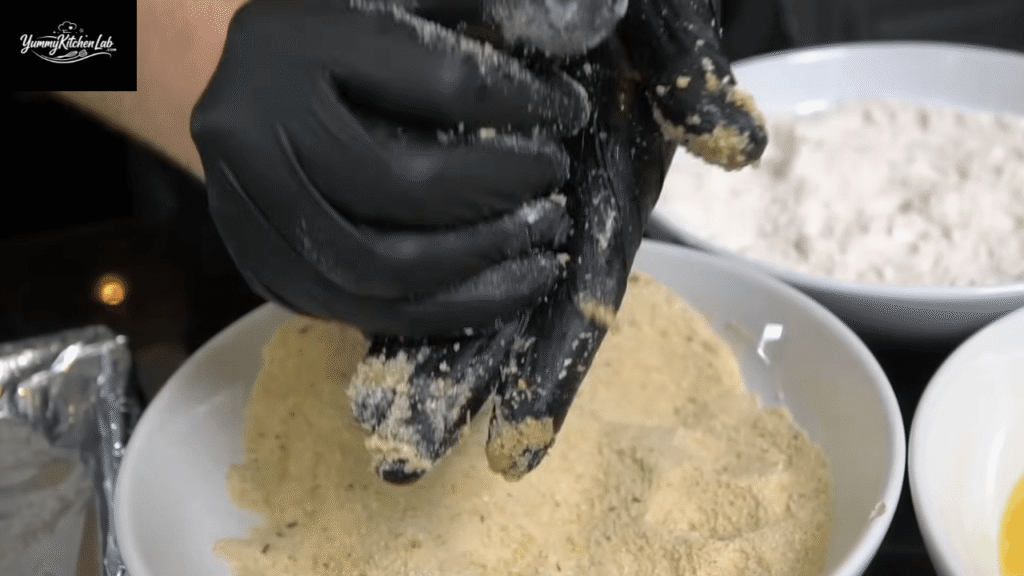
Step 5: Set Up Your Breading Station
While the mac and cheese chills, set up three shallow bowls in a row. Bowl one: all-purpose flour seasoned with your spice blend. Bowl two: three eggs beaten with a splash of heavy cream. Bowl three: Italian breadcrumbs seasoned with your spice blend. Work the seasoning into both the flour and the breadcrumbs with your hands or a fork to distribute it evenly. Having this all ready before you start forming bites makes the process much smoother.
Step 6: Form and Bread the Mac and Cheese Bites
Use a quarter-cup measure or an ice cream scoop to portion the chilled mac and cheese. Press each portion firmly in your hands and roll it into a compact ball. The mixture should hold together without crumbling — if it feels too soft, return it to the freezer for another 15 minutes. Roll each ball through the flour first, then through the egg wash, then press it firmly into the breadcrumbs on all sides. Make sure there are no bare spots in the coating, as any exposed area will break open in the fryer.
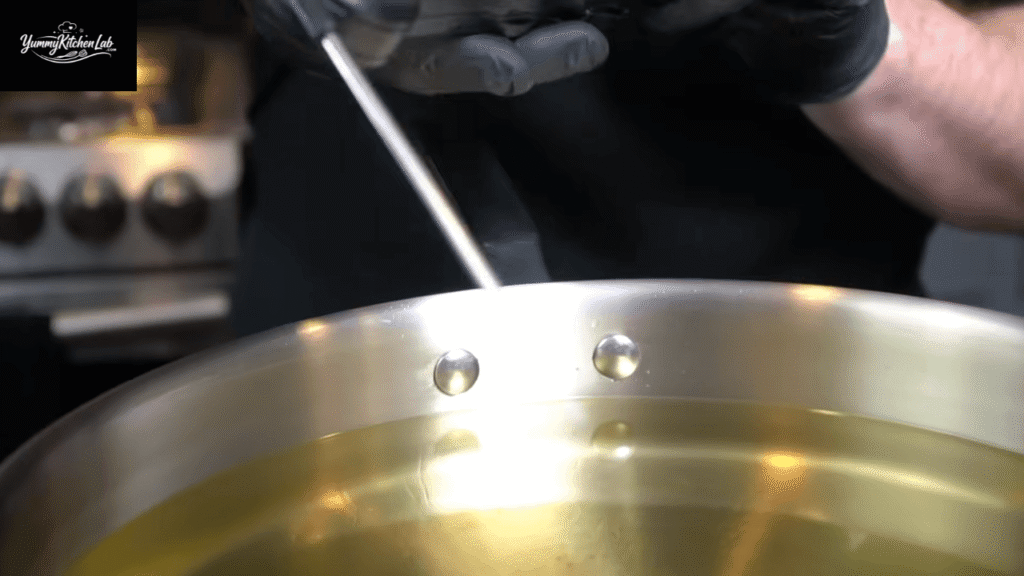
Step 7: Heat the Oil to 350°F
Pour two liters of peanut oil or canola oil into a deep fryer or a heavy-bottomed pot. Heat it to 350 to 365°F, using a digital thermometer to confirm the temperature. Do not guess — oil that is too cool will make the bites absorb grease and turn out soggy. Oil that is too hot will brown the exterior before the center heats through properly. Get the temperature right before anything goes in.
Step 8: Fry the Bites Until Golden Brown
Carefully lower the breaded mac and cheese bites into the hot oil in batches. Do not crowd the fryer — overcrowding drops the oil temperature and results in uneven cooking. Fry for 2 to 3 minutes, turning them occasionally to ensure even browning on all sides. Once they are deep golden brown all over, remove them with a slotted spoon and place them on a wire rack to drain. A wire rack keeps the bottoms crisp — paper towels trap steam underneath and can make them soggy.

Step 9: Make the Dipping Sauce and Plate
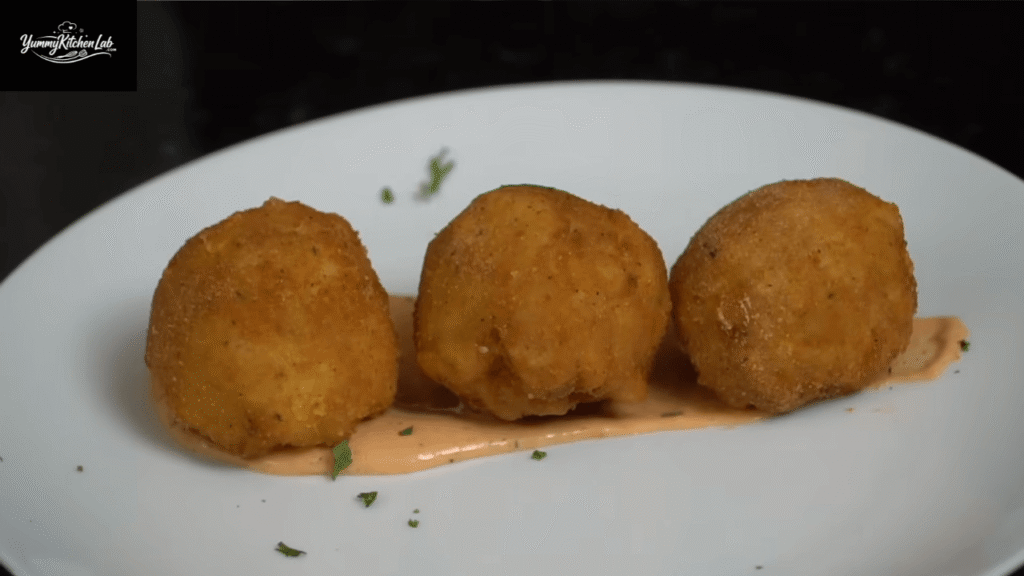
While the bites cool for a minute, whisk together the Japanese mayo, sriracha, garlic paste, ketchup, and cajun seasoning in a small bowl. Taste and adjust — more sriracha for heat, more ketchup for sweetness. Plate the bites on a serving board or shallow plate, drizzle the sauce over the top or serve it on the side in a small ramekin, and finish with a scatter of fresh chopped parsley. That bit of green is purely visual but it makes the whole plate look intentional.
Pro Tips to Make the Perfect Fried Mac and Cheese Bites
A few things separate a batch that turns out perfectly from one that falls apart or tastes flat. Here are the details worth paying attention to.
Grate your own cheese, every time. Pre-shredded cheese has a starch coating that prevents smooth melting. Taking the extra ten minutes to grate it yourself makes a measurable difference in the creaminess of the final filling.
Freeze the cheese blocks before grating. Cold cheese moves cleanly through the grater without sticking or balling up. Fifteen minutes in the freezer is all it takes. This tip alone saves a lot of frustration.
Do not rush the chilling step. One hour in the freezer is the minimum. If the mixture is not firm all the way through, your bites will crack and separate in the fryer. When in doubt, give it more time.
Season every layer. The flour, the egg wash, and the breadcrumbs all need seasoning — not just the mac and cheese filling. Bland breading makes the exterior taste hollow against the bold interior.
Fry in small batches. Adding too many bites at once drops the oil temperature significantly. Lower oil temperature means longer fry time, more oil absorption, and a greasier result. Three to four bites at a time is the right pace for most home fryers.
Use a wire rack, not paper towels. Resting the finished bites on a wire rack lets air circulate underneath and keeps them crispy. Paper towels create a steamy surface that softens the coating within minutes.
Prep a day ahead for parties. You can make the mac and cheese mixture and store it in the refrigerator overnight. Form and bread the bites the next morning, then fry just before serving. This breaks the recipe into manageable pieces and reduces day-of stress.
Taste and adjust seasoning before chilling. Once the mac and cheese is cold and formed into bites, you cannot fix the seasoning inside. Taste the warm mixture and get it right before it goes into the freezer.
Serving Ideas
Fried mac and cheese bites are flexible enough to work in several contexts, from casual snacking to full party spreads. Here are four ways to put them to use.
Game Day Spread
These bites were practically designed for football season. Set them out alongside chicken wings, jalapeño poppers, and a selection of dipping sauces — ranch, buffalo, and the spicy aioli from this recipe all work well together. Make double the batch because they go fast.
Appetizer Course for a Casual Dinner Party
Serve the bites as a first course before a simple main like grilled chicken or a burger bar. The richness of the cheese pairs well with something lighter and grilled. Plate them individually on small boards with the dipping sauce in a ramekin for a clean, intentional presentation.
Kids’ Snack or After-School Treat
Reduce or eliminate the cayenne and sriracha for a kid-friendly version. Pair them with plain ketchup or a mild honey mustard. The size and hand-held format make them easy for younger eaters, and the cheese pull factor always gets a reaction.
Late-Night Party Snack
Fried mac and cheese bites hold up reasonably well in a low oven (around 200°F) for 20 to 30 minutes after frying, making them a good option for parties where people arrive at different times. Keep a batch warm in the oven and pull them out as needed.
For presentation, a wooden serving board with a small ceramic ramekin for the dipping sauce keeps things looking deliberate rather than thrown together. A scatter of chopped flat-leaf parsley over the top adds color contrast against the golden crust. Serve them hot — they are noticeably better within ten minutes of leaving the fryer.
Can I bake these instead of frying them?
You can, but the result is noticeably different. Baked mac and cheese bites tend to have a drier, less crispy exterior compared to the deep-fried version. If you want to try it, bake at 400°F on a wire rack set over a baking sheet for 18 to 22 minutes, flipping once halfway through. Spraying them with cooking spray before baking helps with browning.
Why did my mac and cheese bites fall apart in the fryer?
The most common cause is insufficient chilling. The mixture needs to be completely firm and cold before you form the bites. If the center is still soft when you start rolling, the bites will crack under the heat of the oil and the filling will leak out. Return the mixture to the freezer until it is solid and try again.
Can I use a different cheese blend?
Absolutely. The four-cheese combination in this recipe is a well-balanced starting point, but you have room to experiment. Fontina is a great substitute for mozzarella if you want a richer flavor. Gruyère can replace the smoked gouda. Stay away from very dry aged cheeses like Parmesan as the sole base — they do not melt smoothly enough for this application.
How do I store and reheat leftover bites?
Store cooled bites in an airtight container in the refrigerator for up to three days. Reheat them in an air fryer at 375°F for 4 to 5 minutes, or in an oven at 400°F on a wire rack for 8 to 10 minutes. Avoid the microwave — it softens the crust completely and makes them dense and chewy.
Can I make these ahead and freeze them before frying?
Yes, and it works well. Form and bread the bites, then arrange them in a single layer on a parchment-lined baking sheet and freeze until solid. Transfer to a zip-lock bag and store for up to one month. Fry from frozen at 350°F for 4 to 5 minutes, adding an extra minute or two to account for the frozen center.
Fried Mac and Cheese Bites
Ingredients
- 2 cups elbow macaroni
- 4 cups low-sodium chicken stock
- ½ cups pepper jack cheese, shredded
- ½ cups mozzarella, shredded
- ½ cups mild cheddar, shredded
- ½ cups smoked gouda, shredded
- 1 tsp all-purpose seasoning (salt, pepper, garlic powder, onion powder)
- ¼ tsp cayenne pepper
- ¼ tsp smoked paprika
- 1½ cups all-purpose flour, seasoned
- 3 large eggs
- 2 tbsp heavy cream
- 1½ cups Italian breadcrumbs, seasoned
- 2 liters peanut oil or canola oil
Instructions
- Freeze cheese blocks for 15 minutes, then shred all four cheeses.
- Boil chicken stock, add salt and macaroni, cook 9 to 11 minutes, drain.
- Season hot noodles, fold in shredded cheese until fully melted and smooth.
- Transfer to a casserole dish and freeze for at least 1 hour until firm.
- Set up three bowls: seasoned flour, egg and cream mixture, seasoned breadcrumbs.
- Portion, form into balls, and coat through flour, egg wash, then breadcrumbs.
- Heat oil to 350 to 365°F using a digital thermometer.
- Fry in small batches for 2 to 3 minutes until deep golden brown. Rest on a wire rack.
- Mix dipping sauce ingredients. Plate bites, garnish with parsley, and serve hot.
Video
Notes
- Make the mac and cheese base up to 24 hours ahead and refrigerate overnight.
- Freeze breaded (unfried) bites for up to 1 month and fry from frozen at 350°F for 4 to 5 minutes.
- Reheat leftovers in an air fryer at 375°F for 4 to 5 minutes to bring the crust back.