

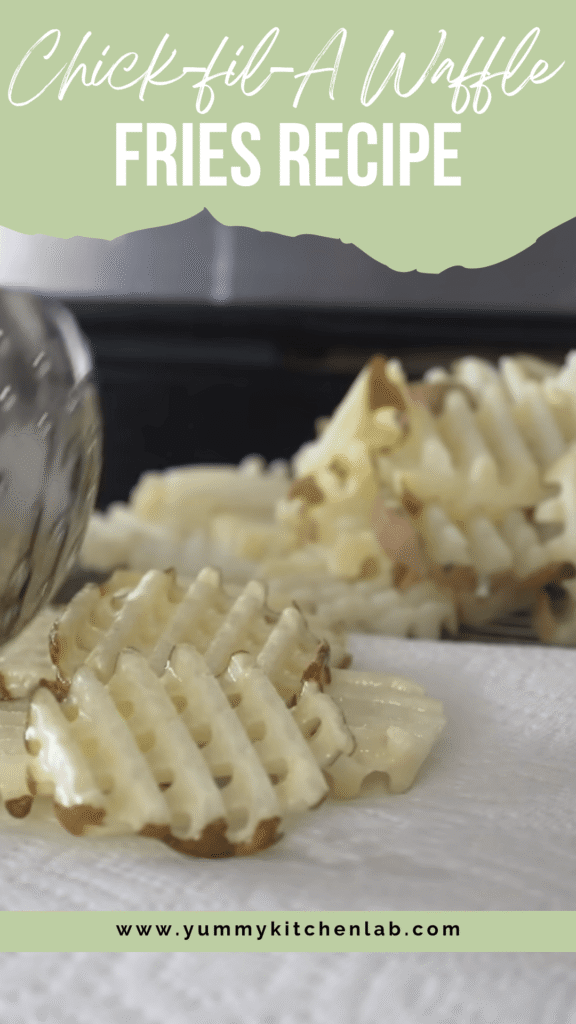
It’s Sunday. You’re craving waffle fries. Chick-fil-A is closed. Classic.
- What You Need to Make Chick-fil-A Waffle Fries at Home
- How to Make Chick-fil-A Waffle Fries Step by Step
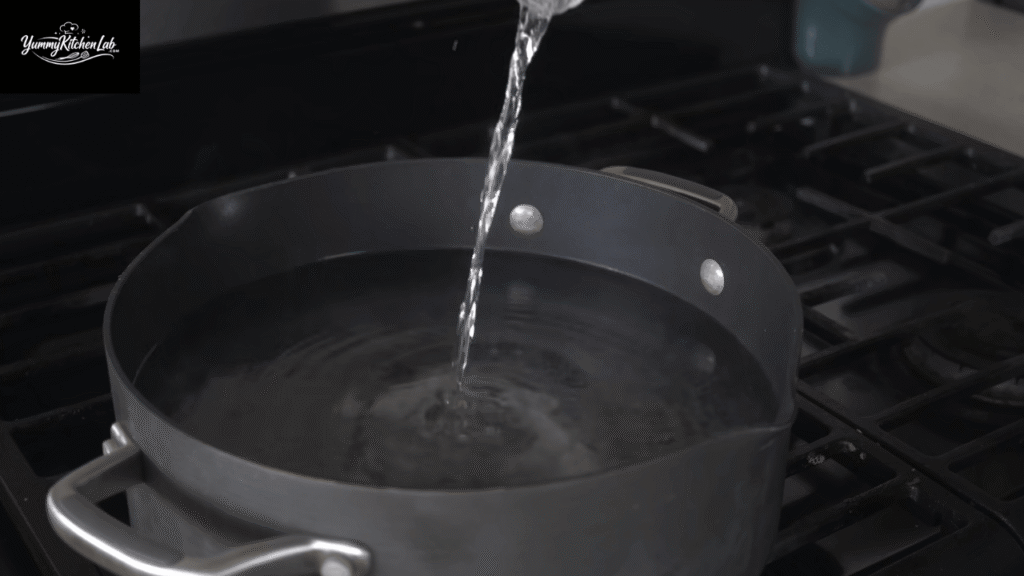
- Step 1: Start the Water First
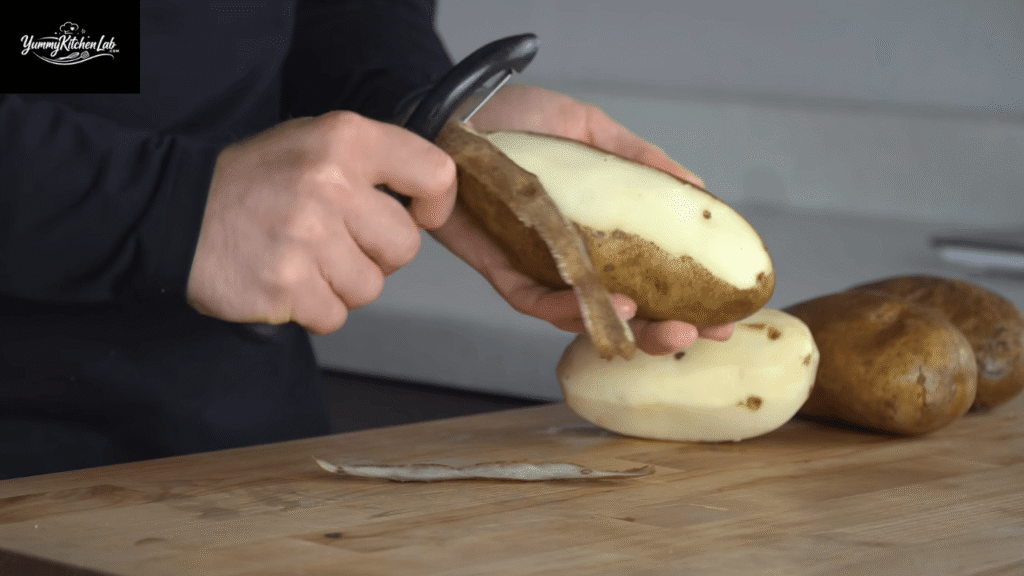
- Step 2: Peel and Prep Your Potatoes
- Step 3: Cut the Waffle Pattern (This Part Matters A Lot)
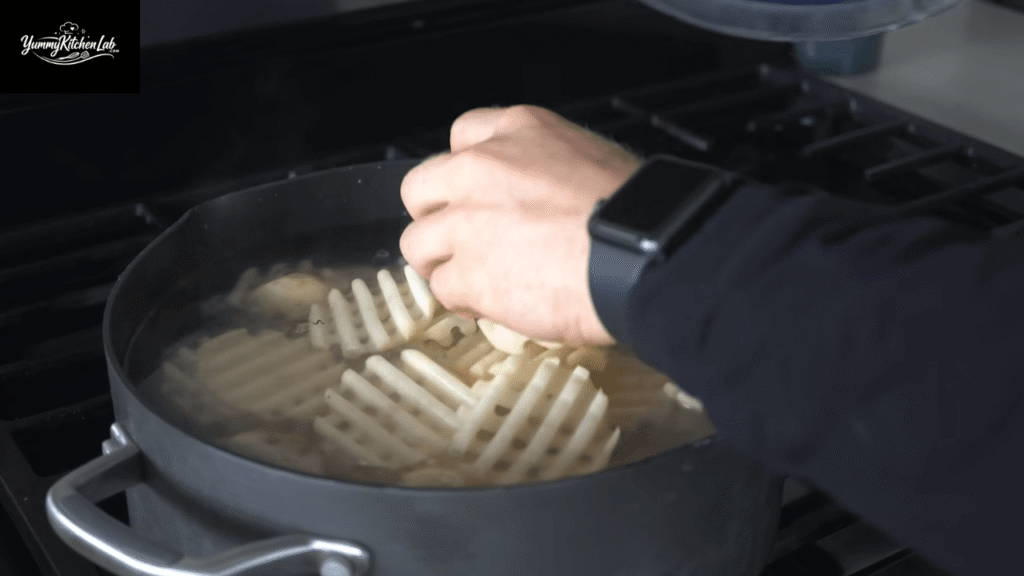
- Step 4: Boil for Eight Minutes
- Step 5: Drain and Let Them Dry
- Step 6: Flash Fry for 60 Seconds
- Step 7: Freeze the Par-Fried Fries
- Step 8: Cook to Order from Frozen
- Pro Tips for Perfect Homemade Waffle Fries
- Serving Ideas for Waffle Fries
- Frequently Asked Questions
- Can I skip the boiling step and fry from raw?
- What if I don’t have a waffle fry cutter?
- How long do the frozen par-fried fries last?
- Can I use an air fryer instead of a conventional oven?
- Why did my fries burn on the outside but stay soft inside?
- Chick-fil-A Waffle Fries Recipe
- Make These Once and You’ll Never Miss the Sunday Closure Again
If you’ve lived this exact moment, you already know the specific kind of frustration it brings. And honestly, that’s the exact problem this Chick-fil-A waffle fries recipe exists to solve. Not a close approximation. Not a “pretty good for homemade” version. The actual crispy, golden, hole-patterned fries you love, made in your own kitchen.
The method here comes from food creator Ethan Chlebowski, who reverse-engineered the recipe using food science research from Kenji López-Alt. The result is a multi-step process that sounds like more work than it is, and once you understand why each step exists, it all makes perfect sense.
The big counterintuitive truth: the best homemade waffle fries are NOT made fresh. You prep them in advance, par-fry them, freeze them, then cook from frozen whenever the craving hits. Sound familiar? That’s exactly how every fast food restaurant does it, and it’s the entire reason their fries stay consistently crispy while most homemade versions end up soft and sad.
What You Need to Make Chick-fil-A Waffle Fries at Home
The ingredient list is refreshingly short. But every single item has a job to do, so don’t go swapping things out randomly.
Russet Potatoes
Russets are non-negotiable here, full stop. They have lower sugar content than other potato varieties, which means the exterior browns properly without burning during the first fry. They’re also starchier and drier than waxy potatoes like Yukon Golds, giving you that light and fluffy interior under a crispy shell.
Using a waxy potato will make your fries dense in the middle and prone to falling apart during boiling. Buy the largest russets you can find since they’re easier to cut into consistent slices and give you more usable fries per potato.
Salt
Salt pulls double duty in this recipe. It seasons the boiling water so the flavor works its way into the potato from the inside, exactly like salting pasta water. Then it finishes the fries right after cooking.
Use kosher salt for the water and fine salt for finishing. Don’t skip salting the boil. Fries seasoned only at the end taste flat and shallow. Fries seasoned during cooking taste like they came from a restaurant.
White Vinegar
This is the ingredient most home cooks skip, and it’s one of the most important ones on the list. Adding about a tablespoon of vinegar to the boiling water keeps the pectin in the potato from breaking down too quickly.
Without it, the fries can get waterlogged and soft during the boil, making them fragile and annoying to handle. You will not taste the vinegar in the finished fry at all. It’s purely functional. Any plain white vinegar works fine.
Peanut Oil
Peanut oil has a high smoke point and a neutral flavor that doesn’t compete with the potato. It’s the standard oil used in fast food frying for exactly these reasons. If you have a nut allergy, refined sunflower oil or refined avocado oil both handle high heat well and work as solid alternatives.
Do not use olive oil or unrefined coconut oil. They smoke too early and add flavor where you really don’t want it. FYI, after frying, strain the oil back into a clean container and save it. You’ll get multiple good uses out of it.
How to Make Chick-fil-A Waffle Fries Step by Step
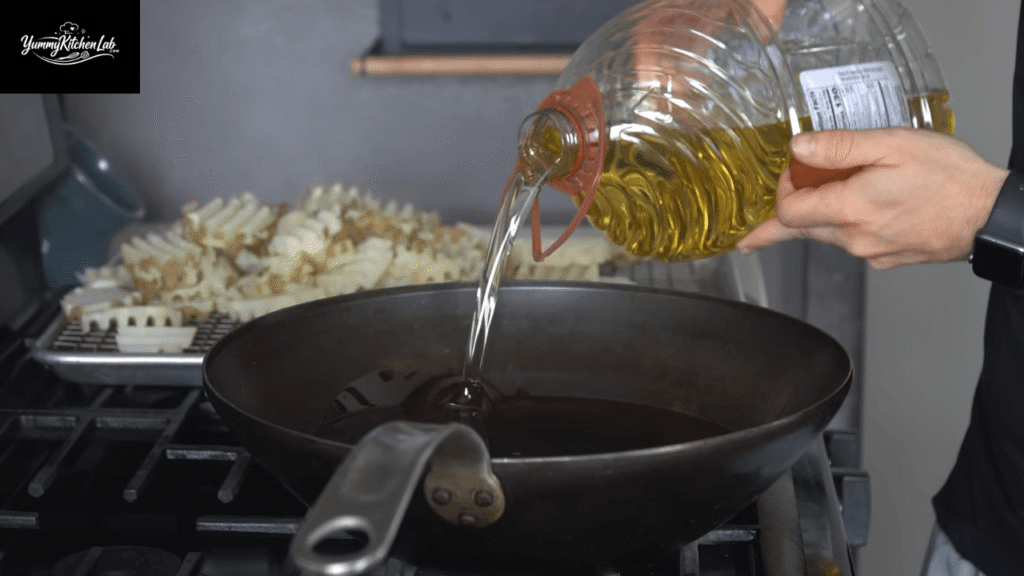
Step 1: Start the Water First
Set a large pot of water on the stove over high heat and let it come to a full boil. Do this before you even touch a potato. It takes time and there’s no reason to have your fries cut and sitting around while the water catches up.
Once it’s boiling, add two large pinches of kosher salt and about a tablespoon of white vinegar. This is not optional.
Step 2: Peel and Prep Your Potatoes
Grab four large russet potatoes. Peeling is actually optional here. The original method splits them half peeled and half unpeeled, and both versions work. Leaving the skin on gives the exterior a slightly more textured edge. Either way, rinse them well before you start cutting.
Step 3: Cut the Waffle Pattern (This Part Matters A Lot)
This step requires a ridged waffle fry cutter or a mandoline with a crinkle attachment that has deep enough ridges to produce actual holes, not just surface texture.
Slice straight down through the potato on the first cut. Then rotate the potato exactly 90 degrees before the second cut. That rotation is what creates the signature holes in the waffle pattern. Skip the rotation and you get ridged chips instead of true waffle fries.
The depth of the ridges on your cutter matters too. A shallow mandoline will produce waffle chips no matter what thickness you cut at. Look specifically for a waffle fry cutter, not a basic crinkle cutter. They’re inexpensive and easy to find online.

Step 4: Boil for Eight Minutes
Drop your cut waffle fries into the salted, vinegared boiling water and set a timer for exactly eight minutes. This boil does several important things simultaneously:
- Seasons the potato from the inside
- Washes away excess surface sugars that would otherwise burn during frying
- Starts to burst the starch granules that form the crispy exterior later
- The vinegar keeps the potato structure intact so fries don’t fall apart
Do not skip this step or shorten it. Eight minutes is the right amount of time for russet potatoes at standard boiling temperature.
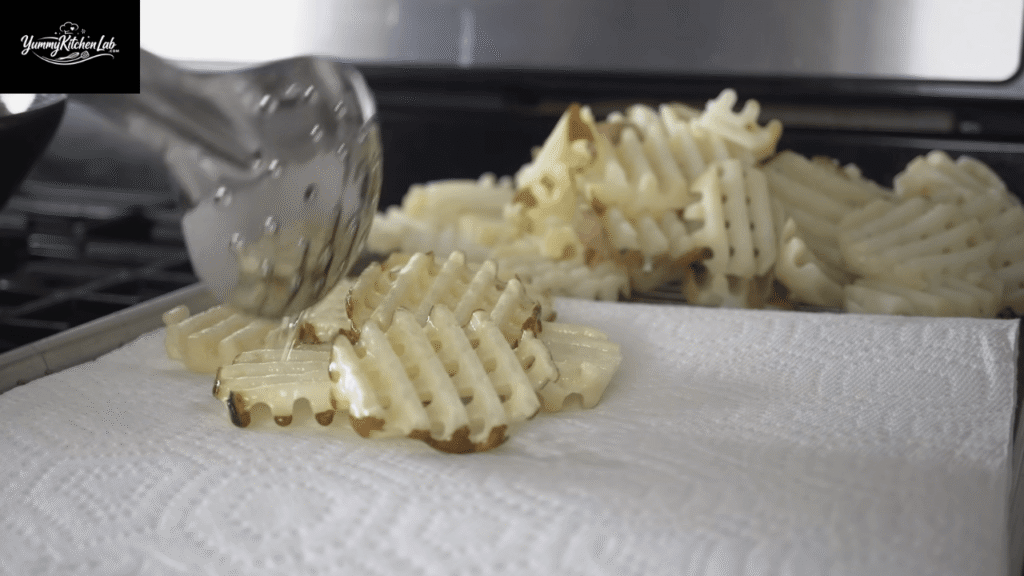
Step 5: Drain and Let Them Dry
Once the timer goes off, strain the fries and transfer them to a wire rack set over a baking sheet. Let them cool and steam-dry for a few minutes. Spread them out so they’re not stacked on top of each other.
This drying step matters because surface moisture on the potato will cause the oil to splatter aggressively when you add them to the fryer. Give them a few minutes. It’s worth it.

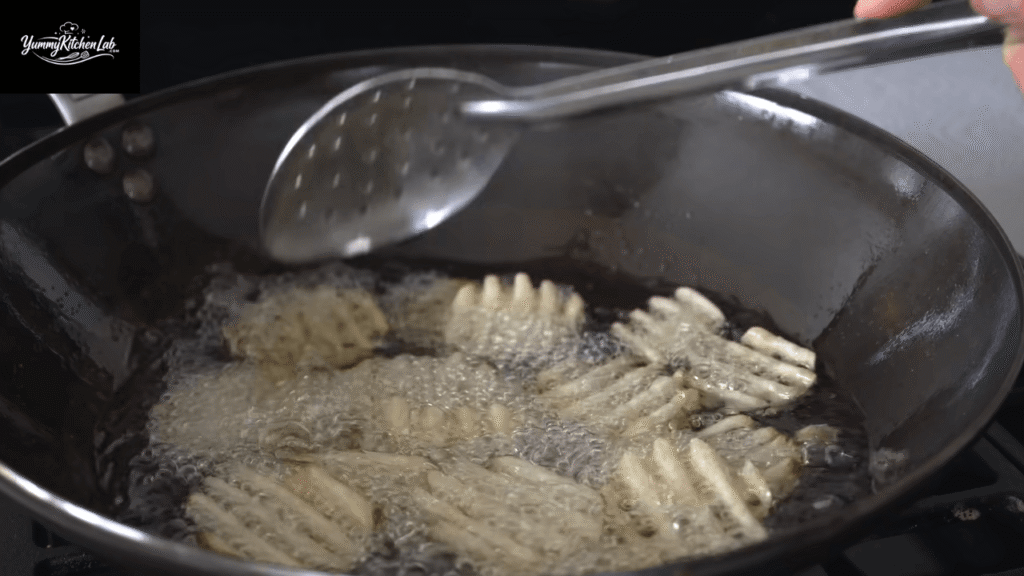
Step 6: Flash Fry for 60 Seconds
Fill a wok or deep pot with about two inches of peanut oil and heat it to 375°F. Working in batches, carefully lower the fries into the oil and fry for exactly 60 seconds. Set a timer.
This first fry is not about cooking them through or making them crispy. It’s about creating surface texture. That brief hit of hot oil bursts more starch granules on the exterior and forms micro-blisters that will turn intensely crispy during the second cook. Pull them out after 60 seconds no matter what they look like
Step 7: Freeze the Par-Fried Fries
Spread the flash-fried fries out on baking sheets and put them straight in the freezer for about an hour until firm. Then transfer them to freezer bags or sealed containers. They keep for up to three months.
Here’s the food science behind why this works: freezing converts the water inside the potato into ice crystals. When those crystals hit hot oil or a hot oven during the second cook, they evaporate almost instantly. That rapid evaporation is what makes the fry crisp up faster and more thoroughly than it ever would from a fresh state. This is genuinely why frozen fries cook better than fresh ones.
Step 8: Cook to Order from Frozen
When you’re ready to eat, pull however many fries you want straight from the freezer. No thawing needed, and actually thawing will hurt the final texture.
To deep fry: Heat peanut oil to 375°F and fry the frozen fries for about four minutes until golden brown and crispy. This method gets closest to the restaurant result. Oil transfers heat more efficiently than air and gives you a crispier exterior with a fluffy interior.
To bake or air fry: Preheat a conventional oven to 475°F, or 425°F for a convection oven or air fryer. Place the fries on a wire rack or aluminum pizza screen, not directly on a baking sheet, so air circulates underneath. Bake for 12 to 15 minutes and flip once halfway through. A light mist of cooking spray helps but isn’t strictly necessary.
Pro Tips for Perfect Homemade Waffle Fries
Small details separate genuinely great fries from ones that are just okay. Here are the most important things to know before you start.
Get the right cutter. A standard crinkle cutter or shallow mandoline won’t work. The ridges need enough depth to create actual holes when you rotate the potato between cuts. A waffle fry cutter is inexpensive and there’s no good workaround for it.
Don’t shorten the boil. Going shorter leaves too much internal moisture and not enough starch development. Going longer risks the fries falling apart before they even hit the oil. Eight minutes is the number.
Fry in small batches. Crowding the oil drops the temperature quickly, which means the fries absorb more oil before they crisp up. Work in batches small enough that the oil recovers its temperature between each one.
Freeze flat before bagging. If you throw the par-fried fries directly into a bag without pre-freezing them flat, they’ll clump into a solid frozen mass. Spread them on baking sheets first.
Don’t waste the oil. After frying, let it cool slightly, then strain it through a fine mesh strainer back into its original container. Peanut oil is pricey and handles several reuses easily. Toss it when it starts to smell off or turns very dark.
Use a wire rack in the oven. A flat baking sheet blocks airflow under the fries and creates a steamed bottom. An oven-safe wire rack or aluminum pizza screen lets hot air hit all sides.
Salt immediately after cooking. Fine salt sticks best when the fry is hot and slightly oily. Wait until they cool down and the salt just slides right off.
Serving Ideas for Waffle Fries
Waffle fries are genuinely better than thin fries for one specific reason: those holes and ridges actually hold sauce. The shape isn’t just aesthetic. It’s a delivery mechanism.
Classic dipping sauce spread: Set out a platter of waffle fries with a few sauces alongside. The fry sauce from the original video, made with mayo, ketchup, brown mustard, Worcestershire, vinegar, honey, and black pepper, is a great starting point. Add ranch and honey mustard for variety. This works perfectly as a side table setup at any backyard gathering.
Loaded fries for a casual dinner: Top a bowl of hot waffle fries with shredded cheddar, sour cream, crumbled bacon, and sliced green onions. The waffle shape holds toppings in a way flat fries simply can’t. This is an easy weeknight dinner option when you want something satisfying without much effort.
Game day snack board: Pile the fries alongside chicken tenders, pickles, and a few dipping sauces on a large board. The waffle shape photographs well and holds up longer without going completely limp. People always notice and ask about it.
Sunday brunch side: Serve the baked version alongside fried eggs and a simple green salad. They’re a better brunch potato than hash browns if you want actual texture. Season with smoked paprika and garlic powder instead of plain salt for a slight flavor variation.
For presentation, serve them in a wide shallow bowl lined with parchment paper to absorb any residual oil. A small ceramic ramekin for dipping sauce on the side keeps things clean and looks intentional.
Frequently Asked Questions
Can I skip the boiling step and fry from raw?
You can, but the results are noticeably worse. The boiling step washes away surface sugars that would otherwise burn before the inside cooks through. It also starts building the starchy exterior that turns crispy in the second fry. Fries that skip the boil tend to be darker on the outside and less crispy overall.
What if I don’t have a waffle fry cutter?
There’s no real substitute if you want the actual waffle shape with holes. A crinkle cutter will give you ridged slices, not waffle fries. You can still follow the same boil-fry-freeze-fry method with regular fry cuts and the results will still be good. But the texture and sauce-holding ability won’t be the same.
How long do the frozen par-fried fries last?
Up to three months in the freezer if stored in sealed bags with as much air removed as possible. After that, they’re still safe to eat but the texture starts to deteriorate from freezer burn. Label the bag with the date so you don’t lose track.
Can I use an air fryer instead of a conventional oven?
Yes. Set the air fryer to 425°F and cook for 10 to 12 minutes, shaking the basket once halfway through. The air fryer actually performs well here because the rapid hot air circulation mimics a convection oven. The results are closer to deep-fried than a standard oven delivers.
Why did my fries burn on the outside but stay soft inside?
This almost always happens when the oil temperature is too low. When the oil isn’t hot enough, the fries sit in it longer before crisping, absorb more oil, and cook unevenly. Use a thermometer to confirm you’re at 375°F before each batch and give the oil a minute to recover between batches.

Chick-fil-A Waffle Fries Recipe
Ingredients
- 4 large russet potatoes
- 2 large pinches kosher salt for boiling water
- 1 (15g) white vinegar
- Peanut oil for frying, about 2 inches in wok
- Fine salt to finish
Instructions
- Bring a large pot of water to boil and add 2 pinches of kosher salt and 1 tablespoon of vinegar
- Peel potatoes (optional), then cut with a waffle fry cutter, rotating 90 degrees between each slice
- Boil the cut fries for 8 minutes, then strain onto a wire rack to cool
- Heat peanut oil to 375°F and flash fry in batches for 60 seconds, then drain
- Freeze on baking sheets for 1 hour, then transfer to freezer bags and store for up to 3 months
- To deep fry from frozen: 375°F oil, 4 minutes until golden
- To bake from frozen: 475°F oven (425°F convection or air fryer), wire rack, 12 to 15 minutes, flip halfway
- Season with fine salt immediately and serve
Video
Notes
- Do not skip the boil or the flash fry. Both are essential for texture.
- Fries cook better from frozen than fresh. Do not thaw before the second cook.
- Strain and save your peanut oil after frying since it’s reusable several times.
Make These Once and You’ll Never Miss the Sunday Closure Again
The whole process comes down to a few simple principles. Use russet potatoes. Don’t skip the boil. Flash fry once. Freeze. Cook from frozen. Salt immediately. That’s it.
Yes, there are a few more steps than just cutting potatoes and throwing them in hot oil. But most of that work happens upfront, and once you have a stash of par-fried fries in your freezer, you’re basically one four-minute fry away from Chick-fil-A quality waffle fries any day of the week, including Sunday.
Give it a shot this weekend. And if your first batch turns out even half as good as the real thing, just wait until you nail the second one.