
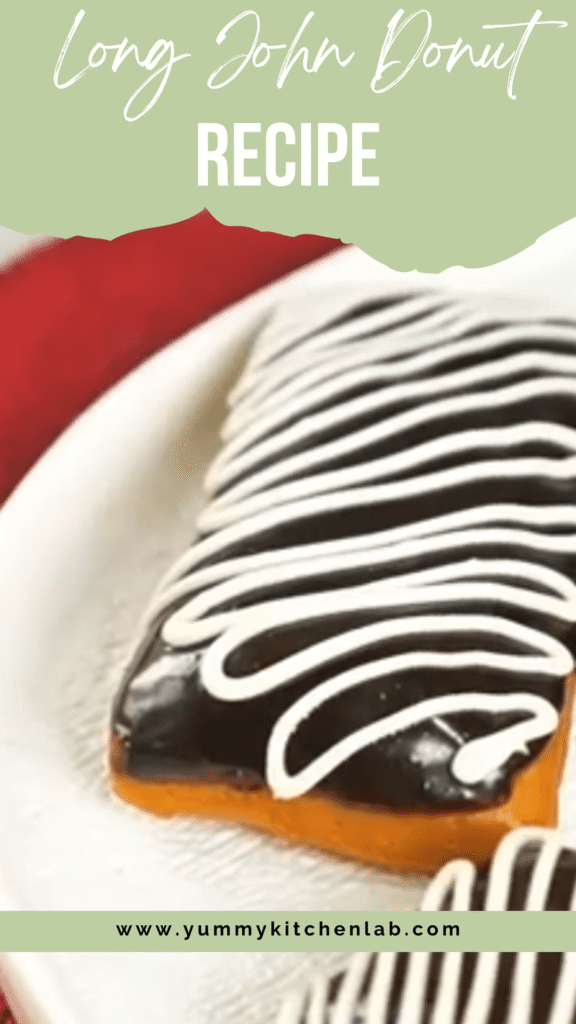
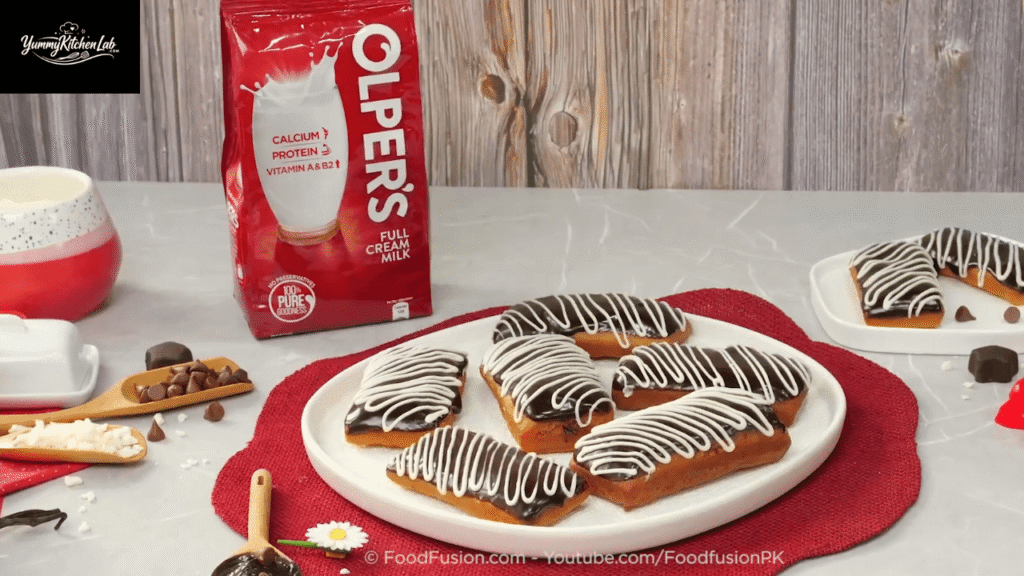
Round glazed donuts are great. Nobody is denying that. But a long john donut hits differently. That soft rectangular shape, the thick chocolate glaze on top, the pillowy yeasted dough underneath… it’s the kind of donut that makes you wonder why you ever settled for the store-bought version.
- What Even Is a Long John Donut?
- Ingredients for Long John Donuts
- How to Make Long John Donuts Step by Step
- Step 1: Proof the Yeast
- Step 2: Mix and Knead the Dough
- Step 3: First Rise
- Step 4: Shape the Long Johns
- Step 5: Second Rise
- Step 6: Fry the Donuts
- Step 7: Make the Chocolate Glaze
- Step 8: Glaze and Set
- Pro Tips for Perfect Long John Donuts
- Serving Ideas for Long John Donuts
- Frequently Asked Questions
- Can I make the dough the night before?
- Why are my donuts absorbing too much oil?
- Can I bake these instead of frying?
- How do I store leftover long john donuts?
- What can I use instead of whole milk?
- Long John Donut Recipe
Fair warning though: this is a yeasted donut recipe. That means you’re working with real dough, real rise times, and real patience. But once you pull these out of the fryer and dip them in that glossy chocolate glaze, you’ll understand why the effort is completely worth it.
What Even Is a Long John Donut?
Long john donuts (also called éclair donuts in some parts of the country) have been a staple of American bakeries since at least the mid-20th century. Their rectangular shape sets them apart from every other donut in the display case, and that shape isn’t just aesthetic. It gives you more surface area for toppings, makes them easier to fill, and honestly just looks more impressive on a plate.
This recipe focuses on the chocolate-glazed classic. No frills, no fancy fillings unless you want them. Just soft, airy dough and a proper chocolate glaze that actually tastes like chocolate.
Ingredients for Long John Donuts
Getting the ingredients right here matters more than most people think. Donut dough is forgiving, but only when you start with the right stuff. Casual substitutions are how you end up with dense, greasy results that no amount of glaze can save
For the Dough
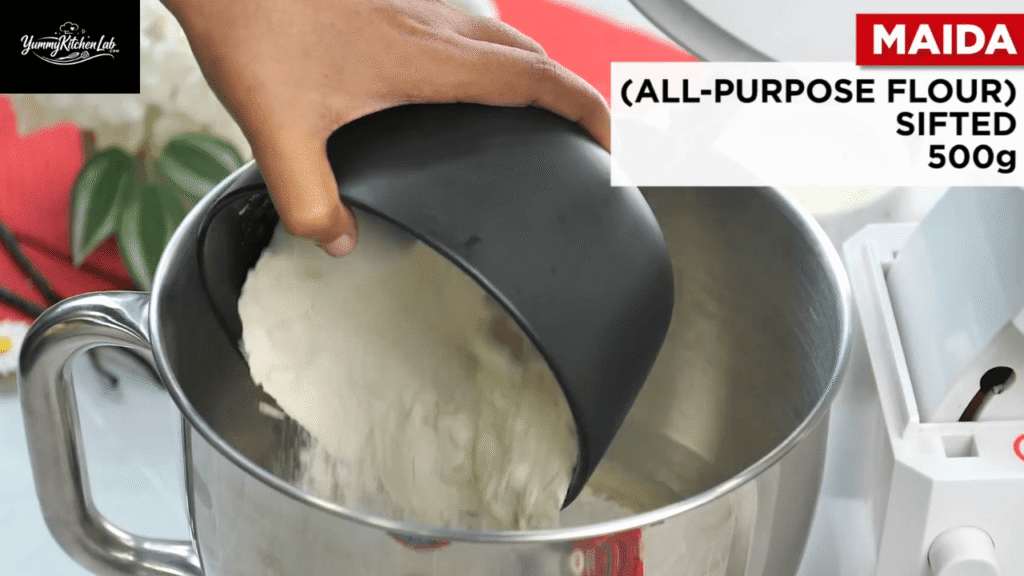
3 cups all-purpose flour — All-purpose gives you enough gluten to hold the rectangular shape without making the donut tough. Bread flour works if you prefer a slightly chewier bite, but all-purpose is the classic choice. Skip self-rising flour entirely. The leavening agents in it will fight your yeast and nobody wins.
2¼ tsp active dry yeast (1 packet) — Yeast is what makes a long john a long john and not a sad cake donut. Active dry yeast needs proofing in warm liquid first (around 100 to 110°F). Instant yeast goes straight into the dry ingredients. Either works. But if your active dry yeast doesn’t foam within 10 minutes, toss it and start over. There’s no saving a dead yeast situation.
¾ cup whole milk, warmed — Whole milk adds fat, flavor, and tenderness to the dough. Skim milk will give you a drier, less flavorful donut. If you need a dairy-free option, full-fat oat milk is your best bet. Warm it to the same lukewarm temperature you’d use for yeast. Hot milk kills yeast instantly, so don’t rush it.
2 large eggs, room temperature — Eggs add richness and hold the dough together through frying. Room temperature eggs incorporate way more evenly than cold ones. Just pull them out 30 minutes before you start. This is one of those small details that makes a noticeable difference.
3 tbsp unsalted butter, softened — Butter adds flavor and keeps the crumb tender. Unsalted so you control the salt yourself. Make sure it’s softened, not melted. Melted butter makes the dough greasy and harder to handle. Add it after the dough has developed some structure, not at the very beginning.
¼ cup granulated sugar — Sugar feeds the yeast, adds mild sweetness to the dough, and helps with browning during frying. Don’t cut it down trying to make the dough “less sweet.” The glaze handles most of the sweetness anyway, and reducing the sugar will mess with your yeast activity and your color.
1 tsp salt — Salt is non-negotiable. It controls fermentation speed, strengthens the gluten structure, and directly affects flavor. A donut without enough salt tastes flat even under a rich chocolate glaze. Keep it away from direct contact with the yeast when mixing by hand.
Neutral oil for frying (vegetable or canola) — The frying oil matters more than most recipes admit. Use a neutral oil with a high smoke point. Vegetable, canola, and sunflower all work well. Olive oil is not suitable here, full stop. Maintain the oil at 350 to 375°F throughout frying. A thermometer is not optional. Guessing the temperature is exactly how you end up with raw centers or burnt outsides.
For the Chocolate Glaze
- 1½ cups powdered sugar
- 3 tbsp cocoa powder (Dutch-process preferred)
- 2 tbsp unsalted butter, melted
- 3 to 4 tbsp milk, as needed
Quick note on cocoa: Dutch-process cocoa gives you a darker, smoother, richer flavor. Natural cocoa works too but the glaze will be lighter in color and slightly sharper in taste. IMO the Dutch-process version is worth hunting down if you can find it.
How to Make Long John Donuts Step by Step
Step 1: Proof the Yeast
Combine warm milk and a small pinch of sugar in a bowl, then sprinkle your yeast over the top. Let it sit undisturbed for 5 to 10 minutes. You’re looking for foam. A foamy, bubbly surface means your yeast is alive and ready. Nothing happening after 10 minutes means your milk was too hot or too cold, or the yeast has expired. Start fresh before you waste the rest of your ingredients.
Step 2: Mix and Knead the Dough
Add your eggs, remaining sugar, and salt to the yeast mixture. Gradually stir in the flour until a shaggy dough forms. Then add the softened butter in small pieces. Knead for 8 to 10 minutes by hand or 5 to 6 minutes with a stand mixer and dough hook until the dough is smooth, slightly tacky, and pulls cleanly away from the sides of the bowl.
The dough should feel tacky but not sticky. Resist the urge to add more flour than the recipe calls for. Extra flour makes tough donuts, and nobody wants that.
Step 3: First Rise
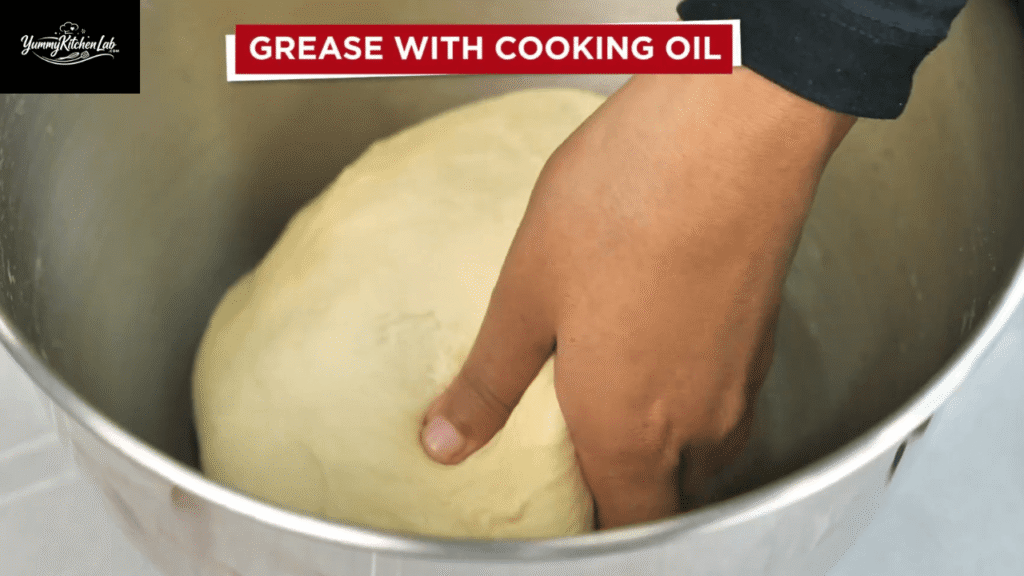
Place the dough in a lightly oiled bowl, cover it with plastic wrap or a clean kitchen towel, and let it rise somewhere warm for 1 to 1.5 hours until it doubles in size. Don’t rush this. The rise is where the flavor actually develops. A slow, full rise makes a noticeably better-tasting donut than one that barely puffed before hitting the oil.
Step 4: Shape the Long Johns
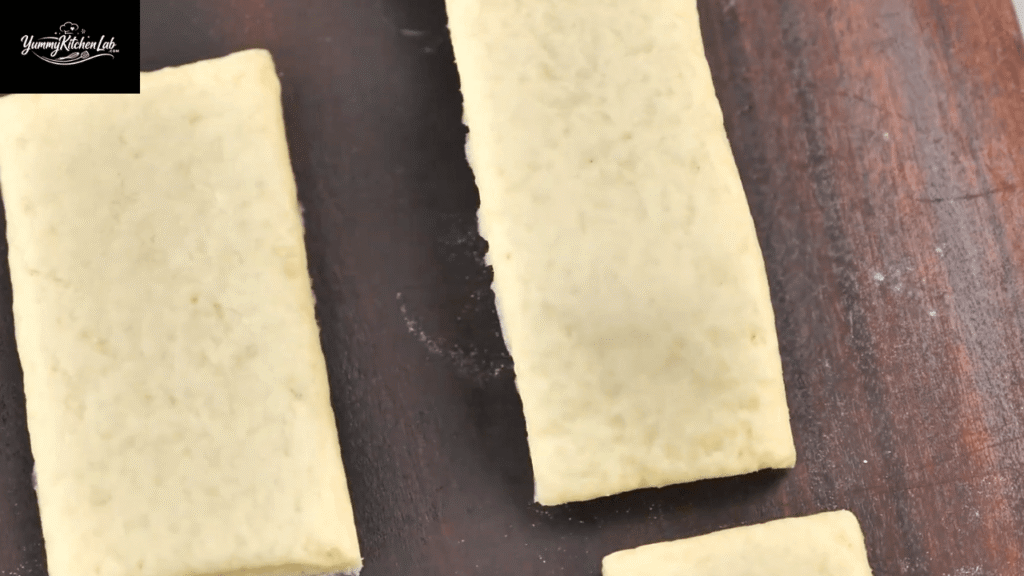
Turn the dough out onto a lightly floured surface and roll it to about ½ inch thickness. Cut into rectangles roughly 4 inches by 1.5 inches. Use a sharp knife or bench scraper here. A dull blade drags the dough, compresses the edges, and slows the second rise. Place the cut donuts on a floured baking sheet with enough space between them so they don’t stick together as they puff.

Step 5: Second Rise
Cover the shaped donuts loosely and let them rise again for 30 to 45 minutes. They should look noticeably puffier but not fully doubled. Overproofed donuts collapse or tear when you move them into the oil, so check on them a little early rather than letting them go too long.
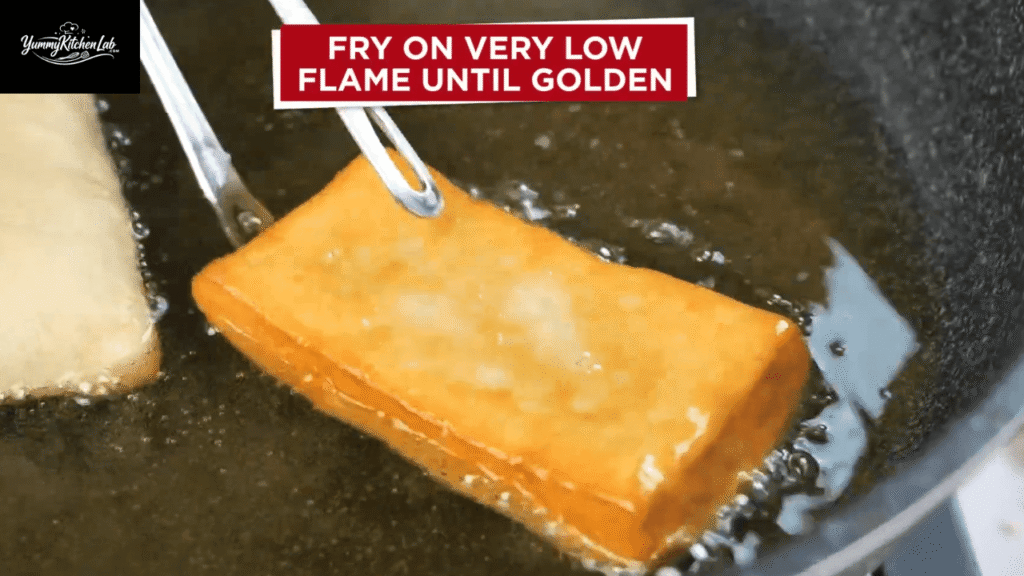
Step 6: Fry the Donuts
Heat your oil in a deep pot to 350 to 375°F. Carefully lower the donuts into the oil one or two at a time using a slotted spoon. Fry for about 1.5 to 2 minutes per side until they reach a deep golden brown. Don’t crowd the pot. Adding too many at once drops the oil temperature fast, and you’ll get greasy donuts instead of the light, crisp exterior you’re going for. Transfer to a wire rack over paper towels to drain.
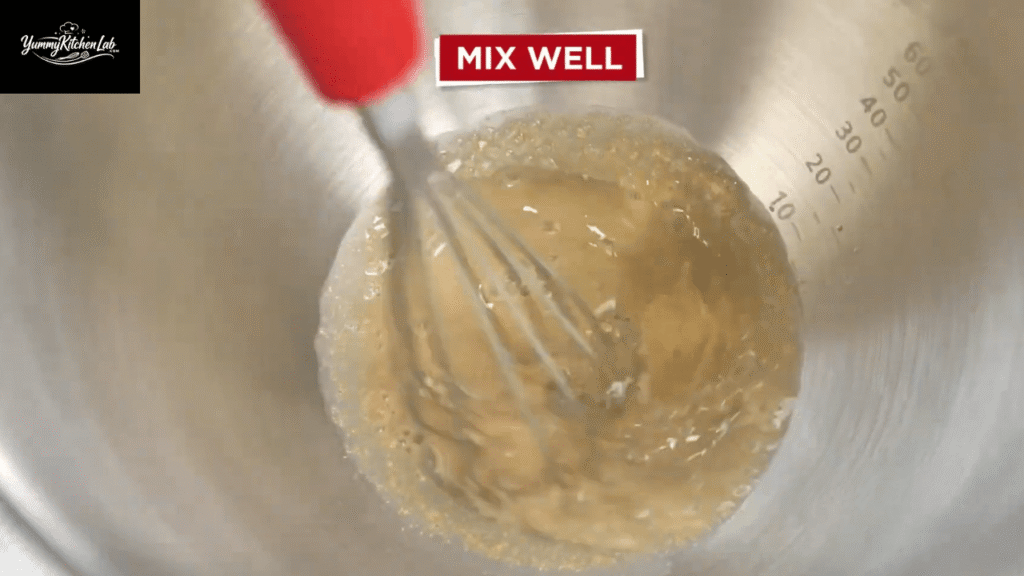
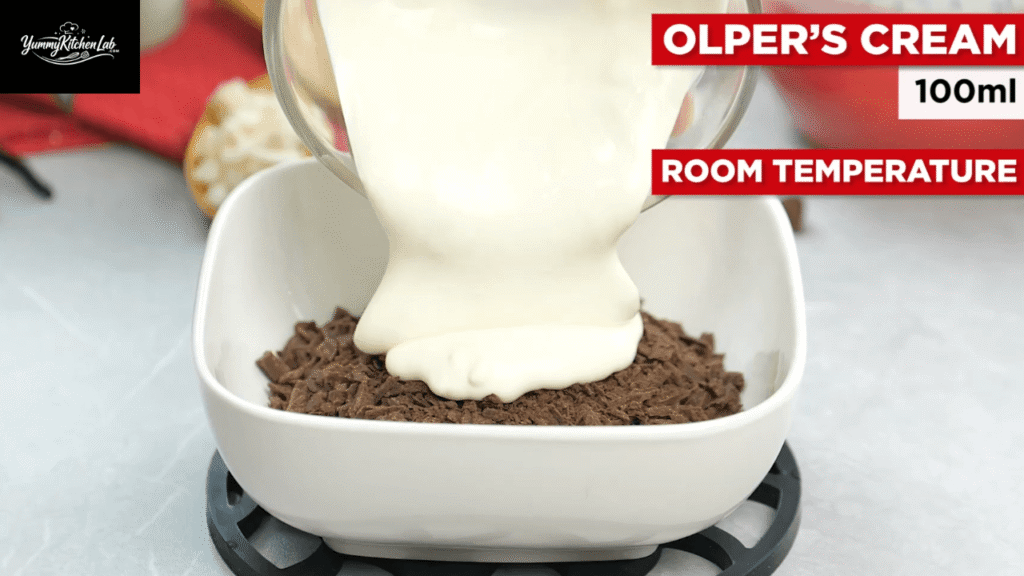
Step 7: Make the Chocolate Glaze
While the donuts cool slightly, whisk together the cocoa powder, powdered sugar, melted butter, and enough milk to reach a thick but pourable consistency. It should coat a spoon and hold its shape briefly before running. Too thin? Add more powdered sugar. Too thick to dip smoothly? Add milk one teaspoon at a time. Don’t rush to a set consistency by dumping in milk all at once.
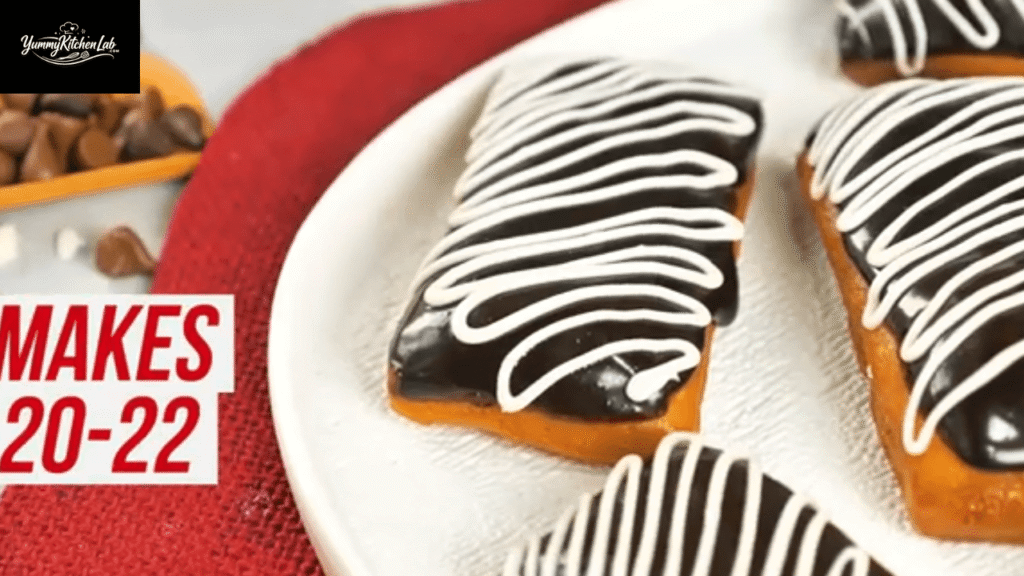
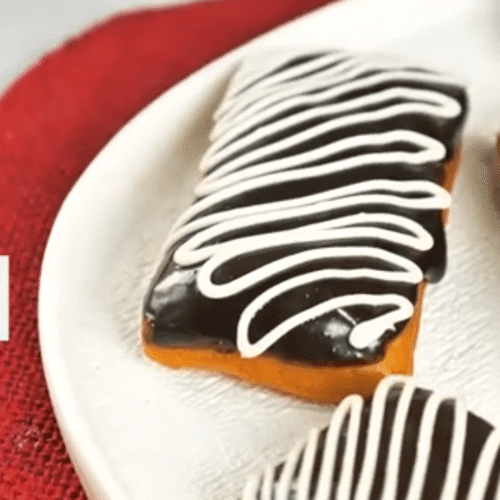
Step 8: Glaze and Set
Dip the top of each donut into the chocolate glaze and let the excess drip off naturally. Set them glazed-side up on the wire rack and leave them alone for 10 to 15 minutes while the glaze sets. Don’t try to speed this up in the fridge. Cold air makes the glaze set unevenly and look cloudy. Patience here. You’re almost done. 😄
Pro Tips for Perfect Long John Donuts
These aren’t bonus suggestions. These are the things that separate a good long john from a genuinely great one.
- Use a thermometer for the oil. Seriously. A cheap clip-on thermometer is one of the best kitchen investments you’ll make. Oil too cool makes greasy donuts. Oil too hot burns the outside before the center cooks. A thermometer eliminates both problems completely.
- Don’t skip the second rise. The second proofing lets the gluten relax and the dough puff slightly before frying. Skip it and your donuts will be denser and tougher than they should be.
- Fry in small batches. Two or three at a time maximum. Let the oil come back to temperature between batches.
- Let the donuts cool before glazing. Hot donuts make the glaze slide right off. Wait until they’re warm but not steaming.
- Keep the dough tacky, not sticky. Too much extra flour makes the donuts tough. Trust the recipe proportions.
- Use Dutch-process cocoa for the glaze. The flavor and color difference compared to natural cocoa is real and noticeable. Worth it.
- Cut cleanly with a sharp knife or bench scraper. A dull blade compresses the dough edges and slows the rise. Sharp tools make better donuts. That’s just the truth.
Serving Ideas for Long John Donuts
Long johns are absolutely best on the day you make them. But here are a few ways to serve them that make them even better.
Classic Breakfast Spread
Pair long johns with a strong dark roast coffee or an Americano. The bitterness cuts through the chocolate glaze perfectly. Add fresh fruit or a soft-boiled egg on the side if you want something to balance the richness.
Dessert Platter
Long johns hold their shape well on a dessert board. Pair them with chocolate-covered pretzels, dark chocolate brownies, or hazelnut truffles. The rectangular shape makes them easy to stack and arrange neatly without them rolling everywhere (looking at you, round donuts).
Filled Long John Variation
Want to take it up a notch? Slice the donut horizontally halfway through and pipe in pastry cream or whipped cream before glazing the top. This turns a straightforward chocolate long john into something very close to a proper éclair. It’s a little extra effort and absolutely worth it.
Kids’ Baking Activity
Long johns are great for weekend baking projects with kids. Set up a simple glaze station with sprinkles and let them dip their own. The rectangular shape is much easier for small hands to manage than a round donut.
Frequently Asked Questions
Can I make the dough the night before?
Yes, and honestly the flavor is even better when you do. After the first rise, punch the dough down, cover it tightly, and refrigerate overnight. The slow, cold rise develops more flavor in the dough. The next day, pull it out, let it sit at room temperature for about 30 minutes, then shape and do your second rise as normal.
Why are my donuts absorbing too much oil?
Your oil temperature dropped during frying. When the oil isn’t hot enough, the dough soaks it up instead of forming a quick crust on the outside. Fry in smaller batches and keep a close eye on your thermometer between batches.
Can I bake these instead of frying?
Technically yes, but let’s be real about what you’re getting. Baked long johns are closer to a soft bread roll with chocolate icing than an actual donut. The lightness and slightly crisp exterior only happen in the fryer. If you’re determined to bake them, go with 375°F for 12 to 15 minutes and adjust your expectations accordingly.
How do I store leftover long john donuts?
Store them in an airtight container at room temperature for up to two days. Do not refrigerate them. Cold air dries out yeasted donuts fast. If they need a little revival on day two, a few seconds in the microwave does the trick reasonably well.
What can I use instead of whole milk?
Full-fat oat milk is the most reliable substitute in both the dough and the glaze. Almond milk works but produces a slightly drier dough. Avoid rice milk. It’s too thin and watery to provide the richness the dough actually needs.
Long John Donut Recipe
Ingredients
- 3 cups all-purpose flour
- 2¼ tsp active dry yeast (1 packet)
- ¾ cup whole milk, warmed
- 2 large eggs, room temperature
- ¼ cup granulated sugar
- 1 salt
- 3 unsalted butter, softened
- Neutral oil for frying
- 1½ cups powdered sugar
- 3 cocoa powder (Dutch-process preferred)
- 2 unsalted butter, melted
Instructions
- Proof yeast in warm milk with a pinch of sugar for 10 minutes until foamy
- Mix in eggs, sugar, and salt. Add flour gradually and knead until smooth, 8 to 10 minutes
- Add softened butter in pieces and knead until fully incorporated
- Rise in oiled bowl, covered, for 1 to 1.5 hours until doubled
- Roll dough to ½ inch thick and cut into 4×1.5-inch rectangles
- Second rise on floured baking sheet for 30 to 45 minutes
- Fry in 350 to 375°F oil for 1.5 to 2 minutes per side until golden. Drain on wire rack
- Whisk glaze ingredients, dip tops of cooled donuts, and let set for 15 minutes
Video
Notes
- Make the dough the night before and refrigerate after the first rise for even better flavor
- Store finished donuts airtight at room temperature for up to 2 days. No fridge
- For filled long johns, slice horizontally and pipe in whipped cream before glazing
The Bottom Line
Long john donuts take time, and that’s exactly why they taste the way they do. The yeasted dough, the two rise times, the careful frying temperature. None of it is difficult. All of it matters.
The biggest things to remember: proof your yeast properly, don’t rush the rises, keep your oil at the right temperature, and let the donuts cool before glazing. Get those four things right and you’re basically guaranteed a great result.
These are genuinely one of the most rewarding things you can make at home. Once you do it once, you’ll completely stop wondering whether the effort is worth it. Give it a shot this weekend and let me know how it goes
Long john donuts take time, and that’s exactly why they taste the way they do. The yeasted dough, the two rise times, the careful frying temperature. None of it is difficult. All of